
When should I do this?
If your BirdNET-Pi will only be placed within range of your Wi-Fi (glossary)A group of at least two devices exchanging data — wired (LAN) or wireless (Wi-Fi). A hotspot is a device providing a Wi-Fi network. , you can skip the following steps. In this part we’ll configure settings so that, if your BirdNET-Pi is outside your Wi-Fi, it works as a hotspot and broadcasts its own Wi-Fi network (this one has no internet access). That way you can, for example, connect to the BirdNET-Pi from your phone over Wi-Fi and access its data. Here you can also, for instance, add further Wi-Fi networks or change the Wi-Fi credentials you already entered during the Raspberry Pi OS setup.
Instructions
- Connect via SSH.
- Now we edit the Wi-Fi and hotspot settings. To do this, we first have to open the Network Manager:
sudo nmtui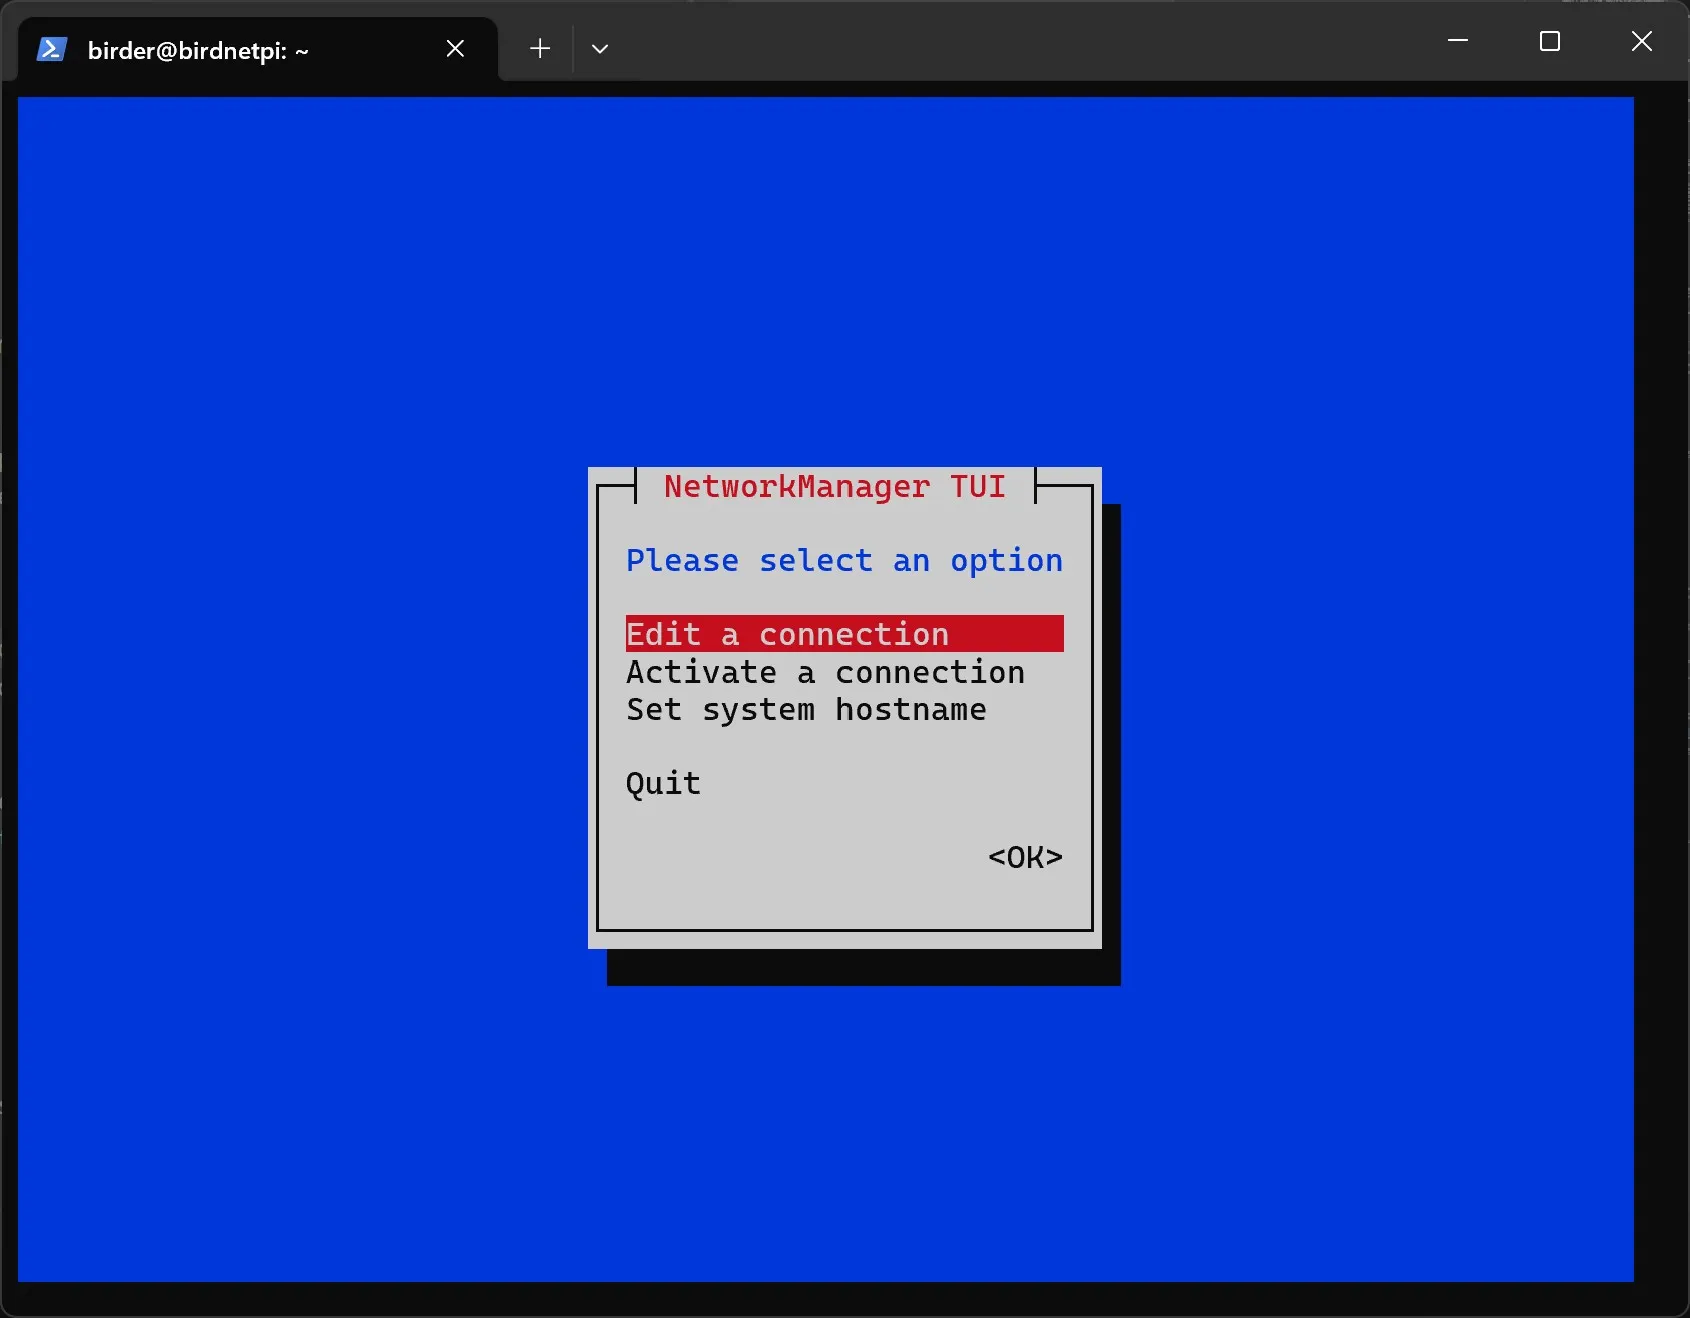
-
In the Network Manager you can move the selected element with the arrow keys and confirm with Enter.
-
Choose
Edit a connection.
- Choose
Add.
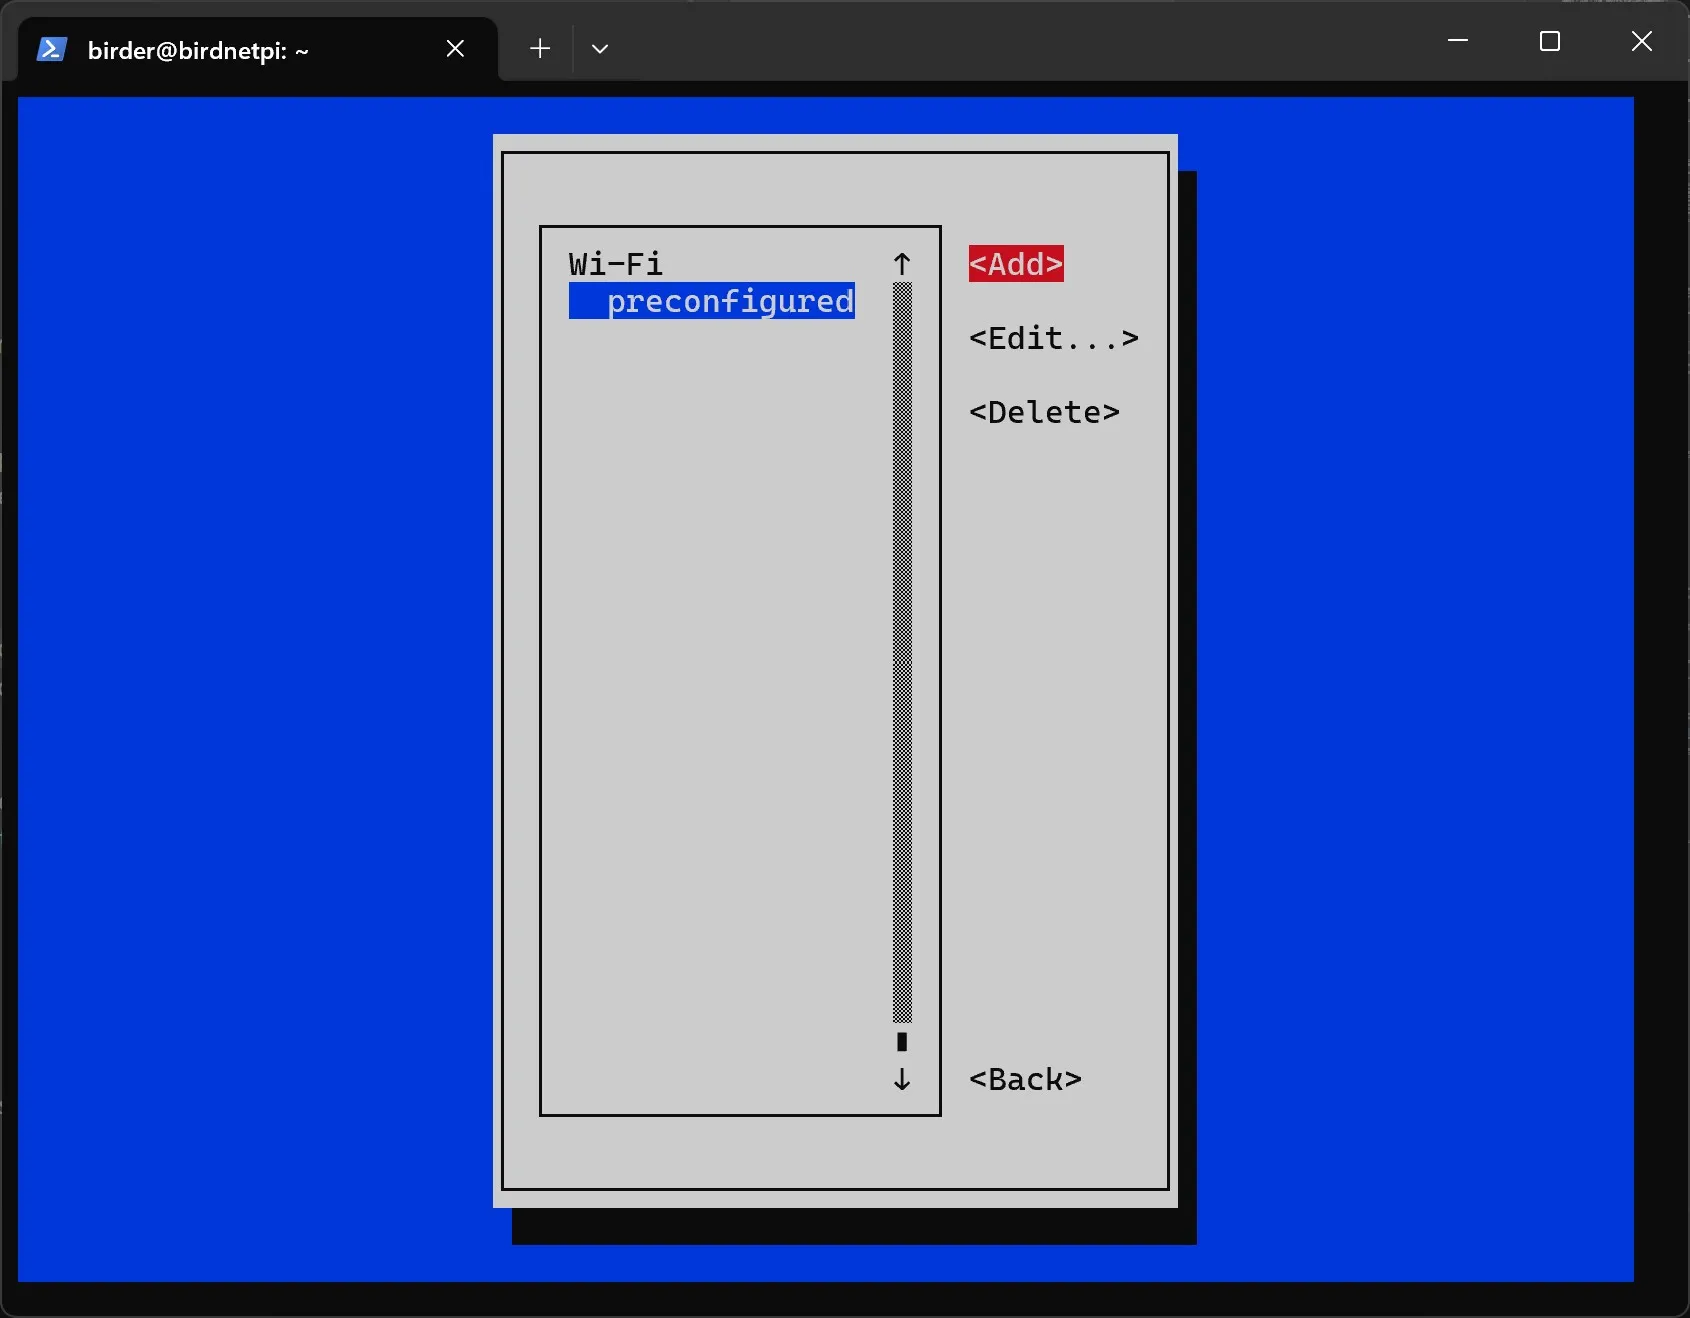
- Choose
Wi-Fias the connection type.
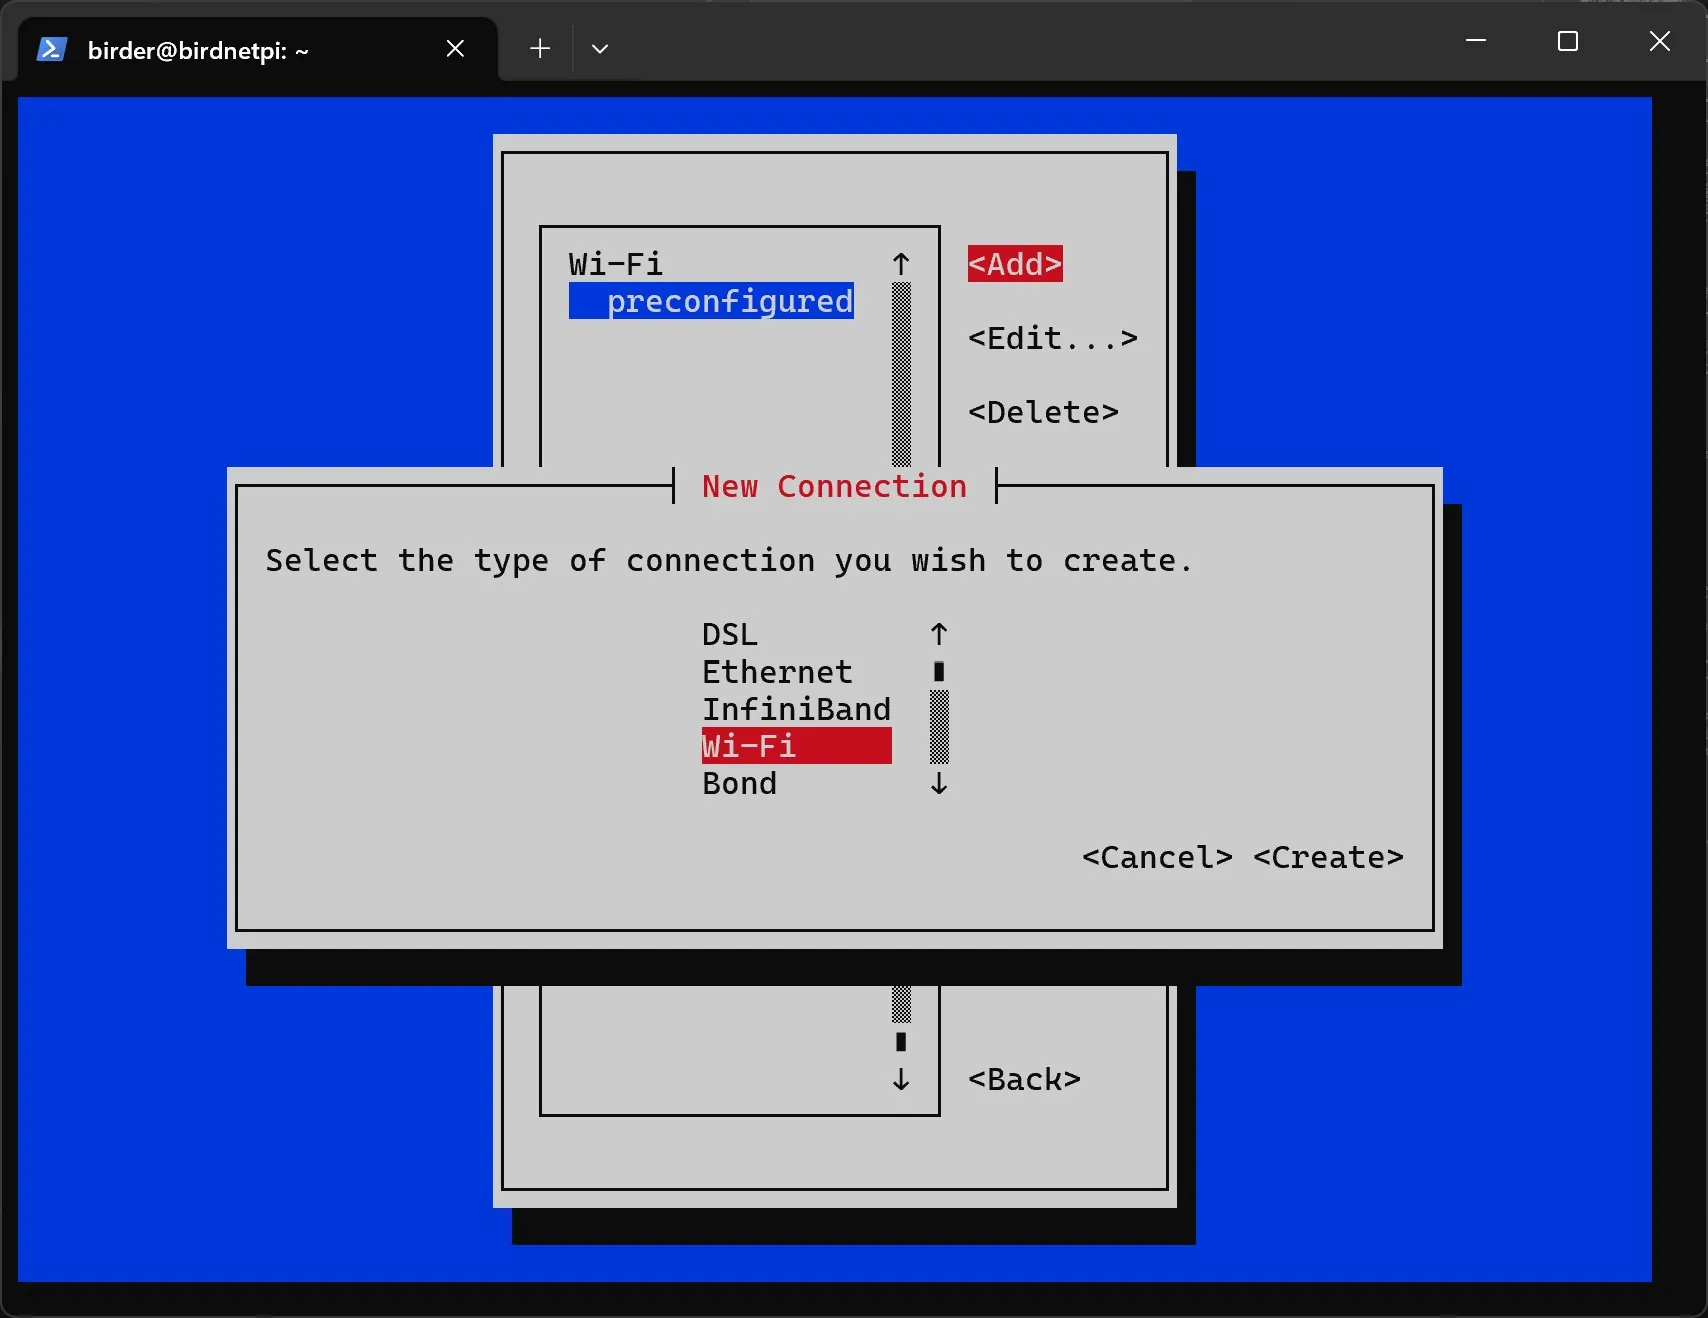
- Choose
Create.
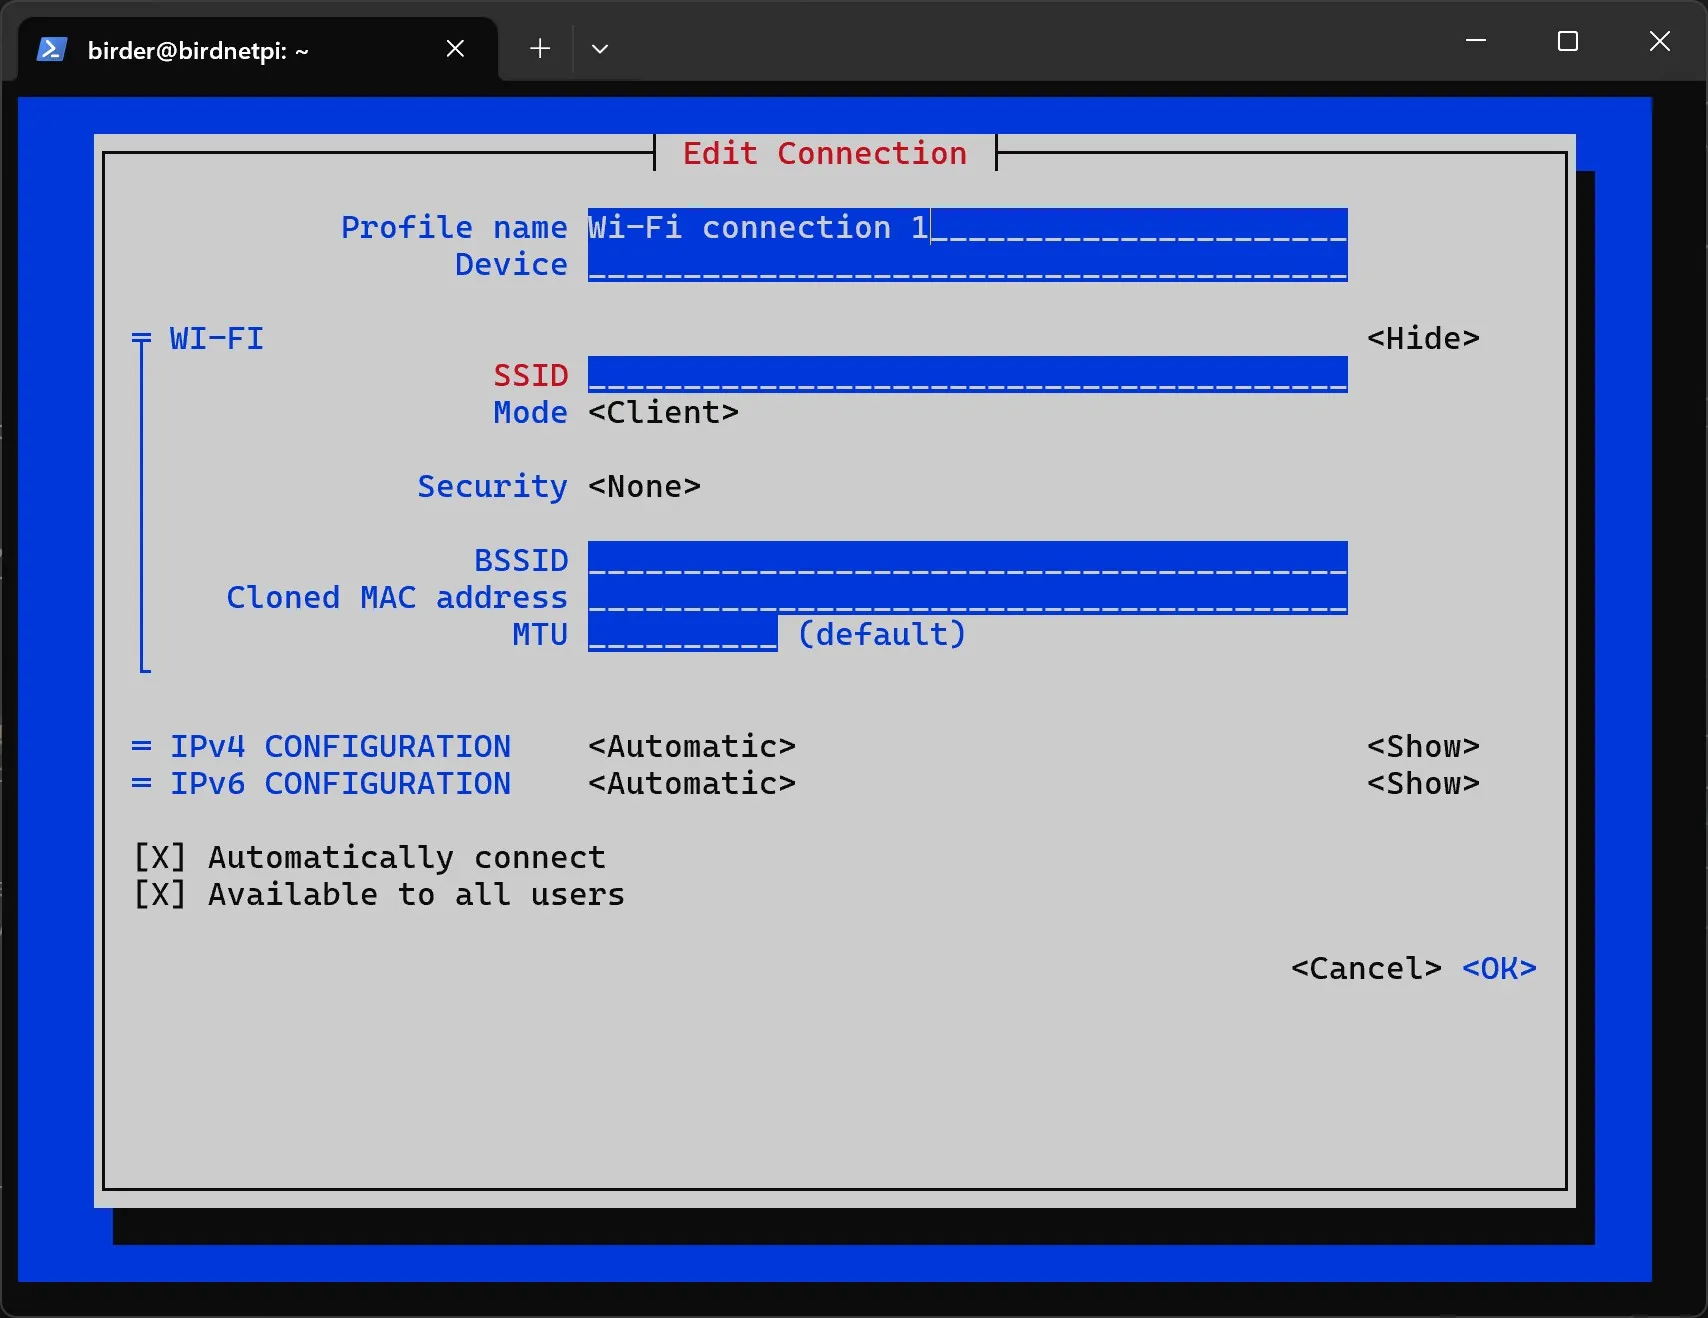
-
Now the details of your network need to be added.
-
Profile Nameis only for identification; you can enter any name here. But make sure that in the following commands you replace “Hotspot” with the name you chose. -
Deviceis wlan0. -
SSIDis the name of the Wi-Fi network that will be created; you can choose this freely too, but remember it!
-
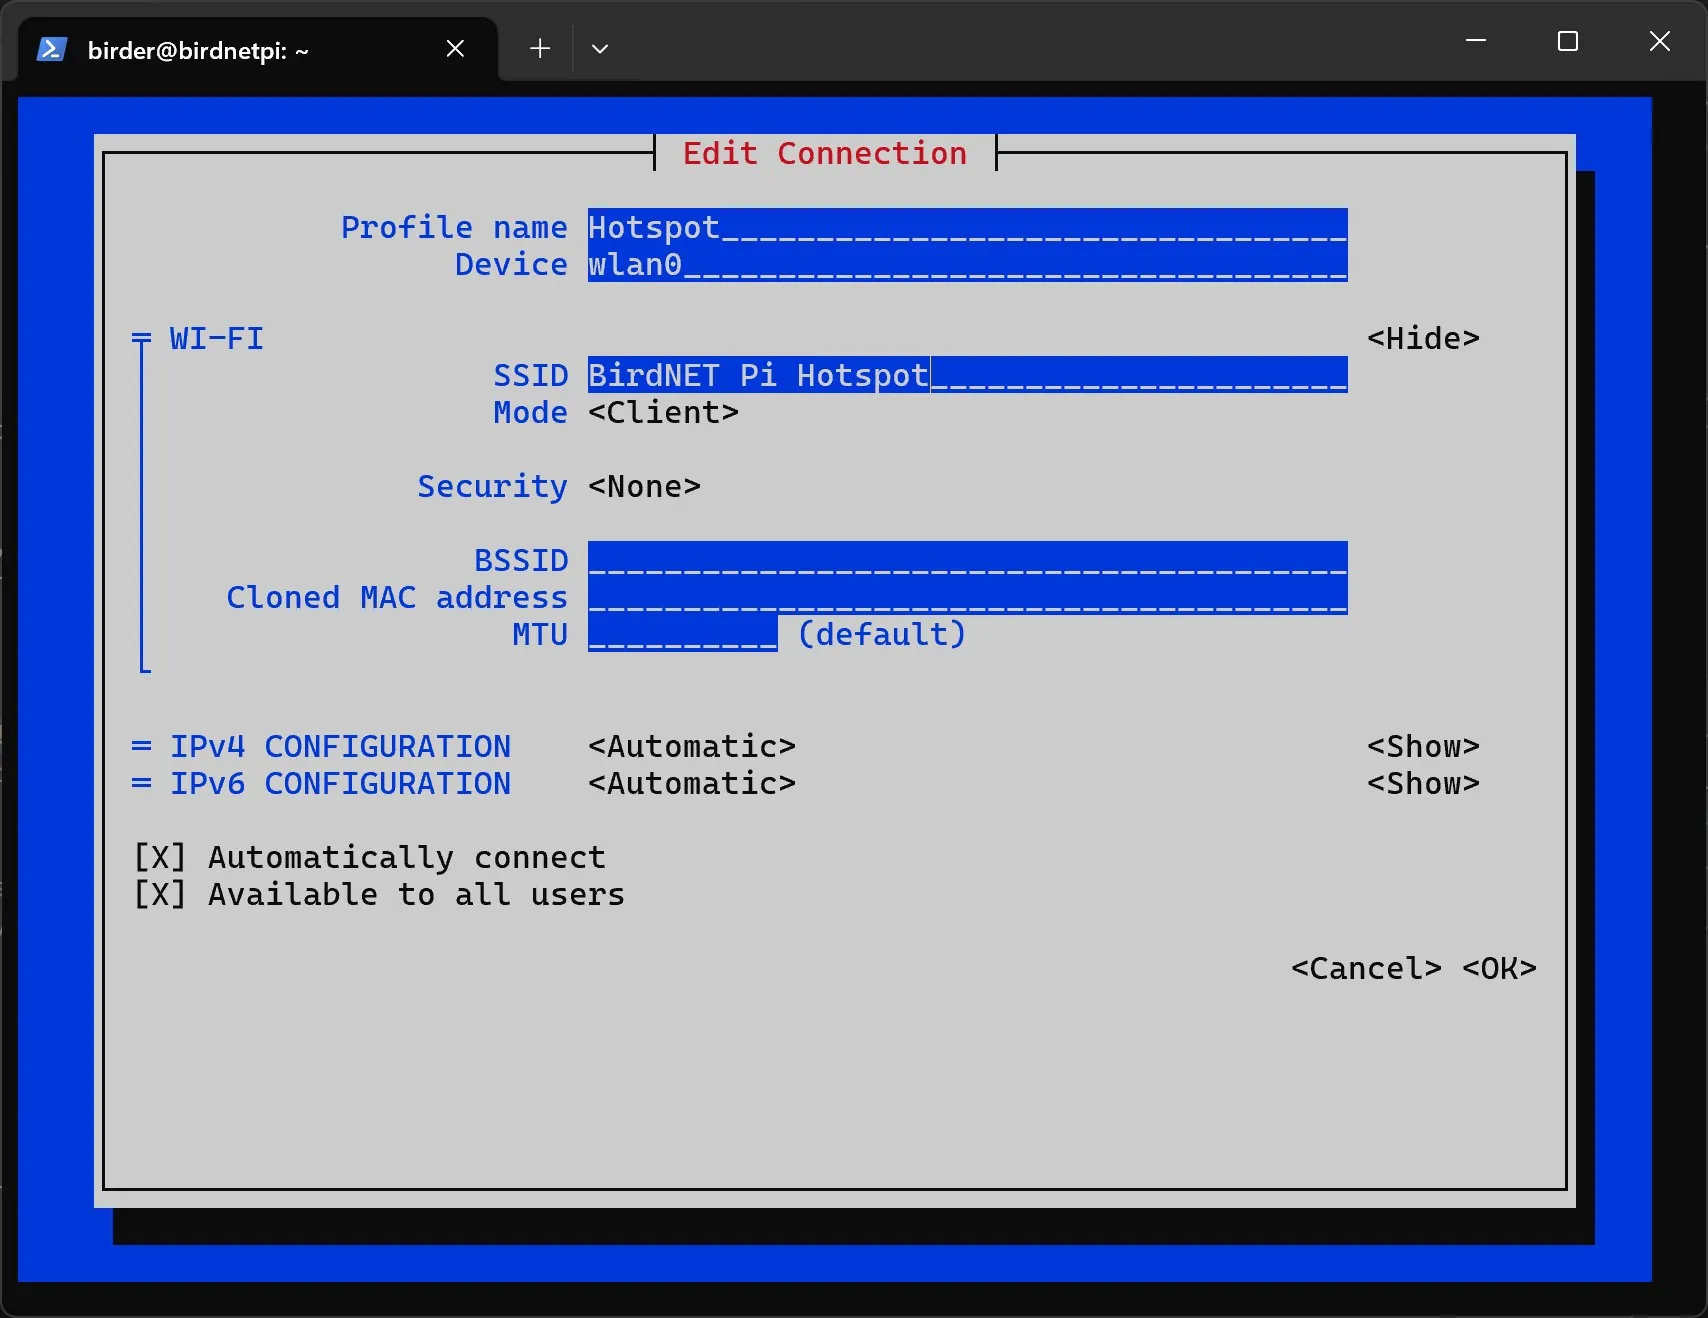
- For
Mode, selectAccess Point.
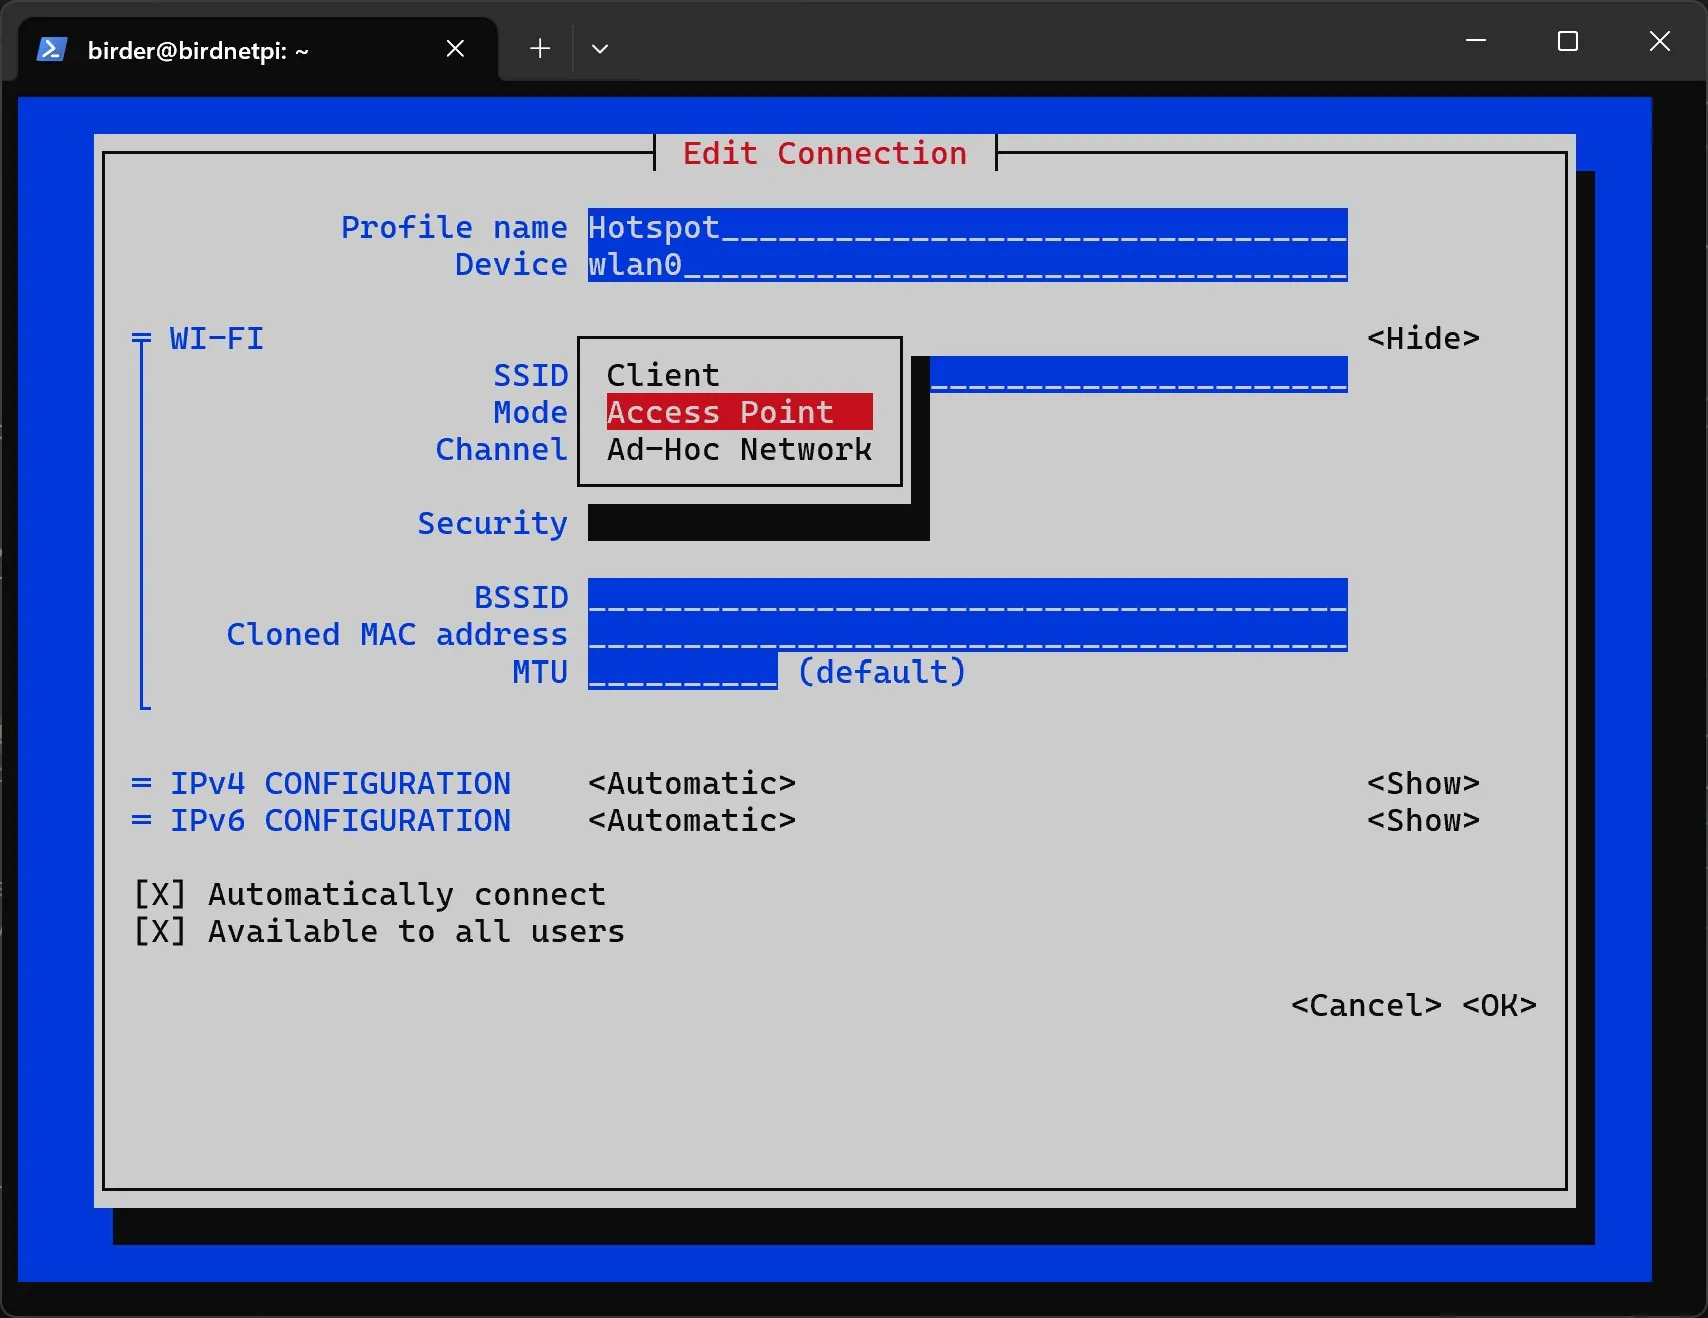
- For
Channel, selectB/G (2.4 GHz).
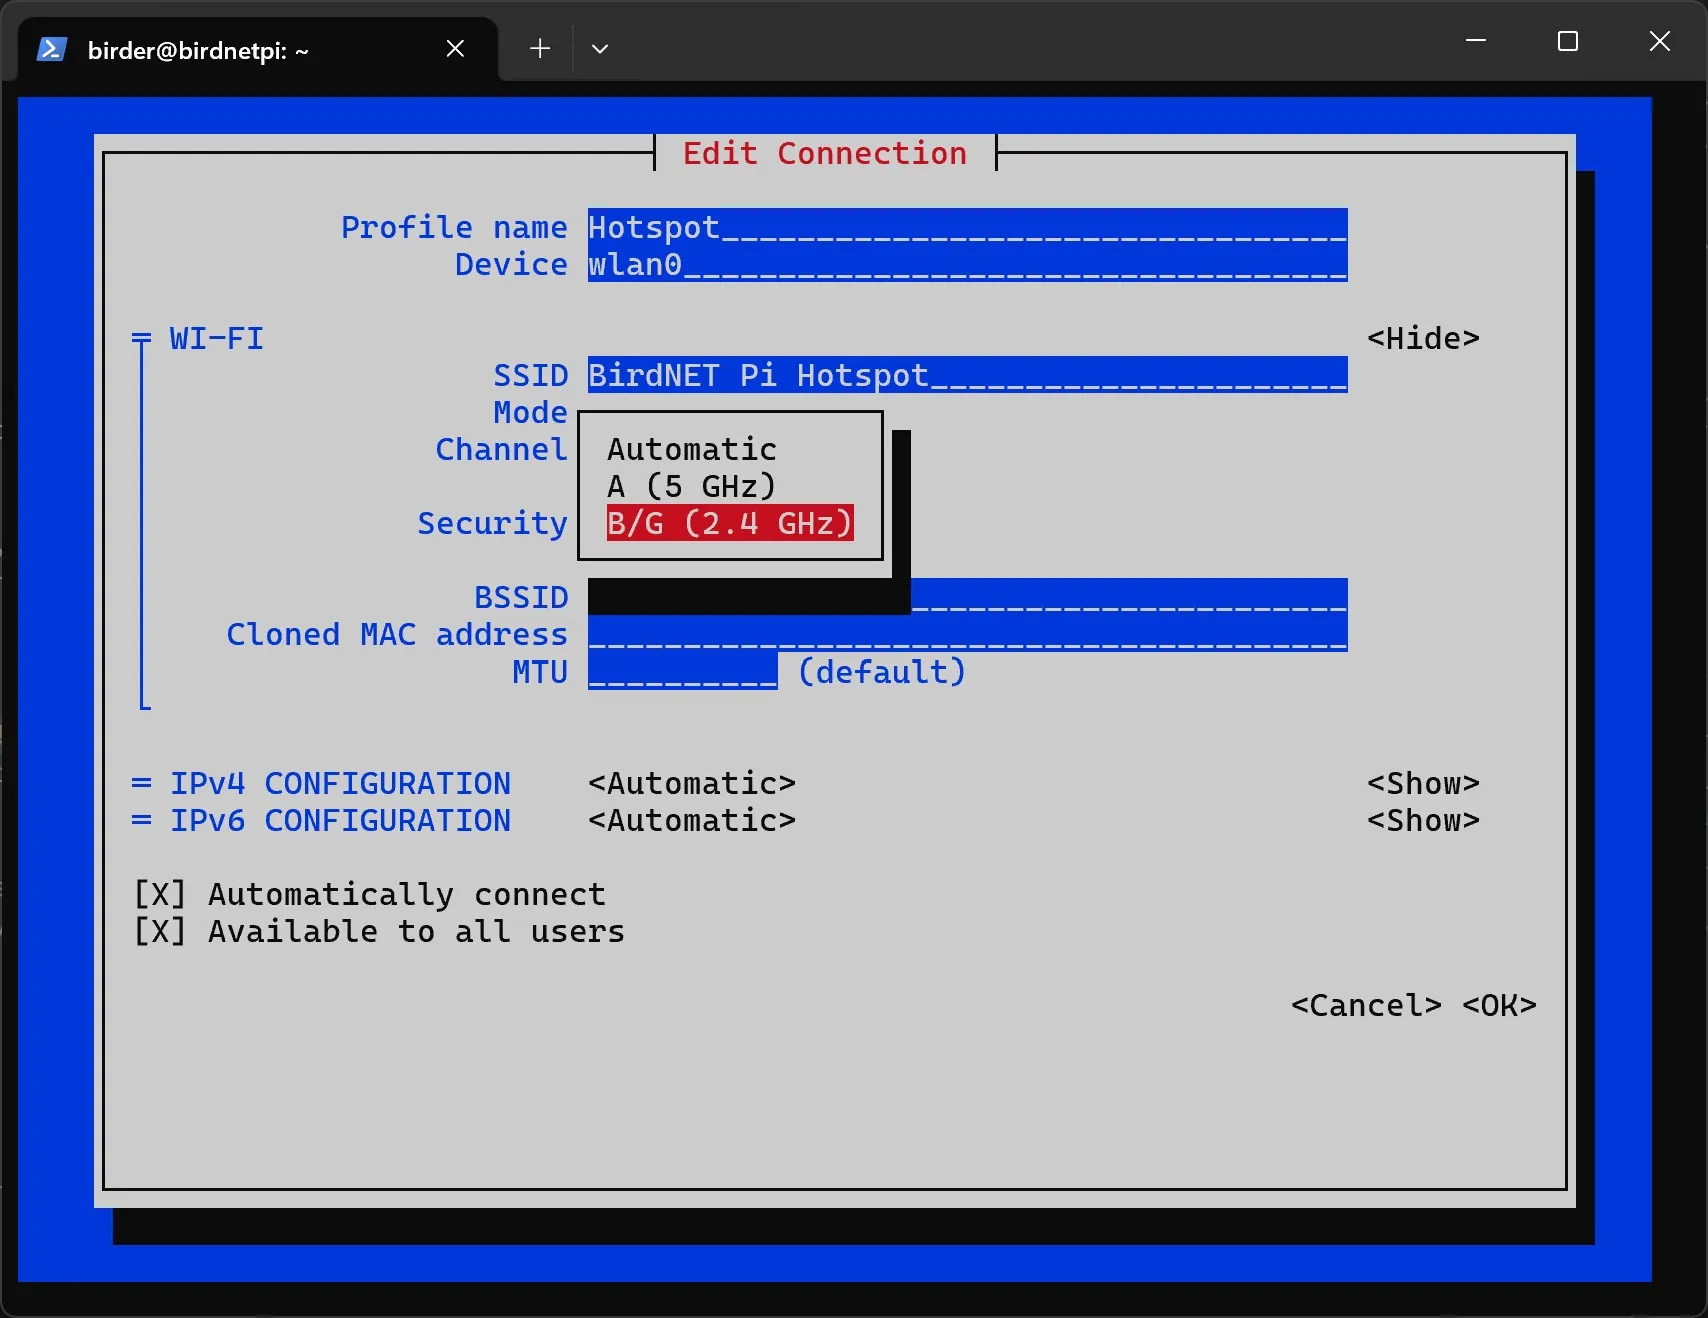
- For
Security, chooseWPA & WPA2 Personal.
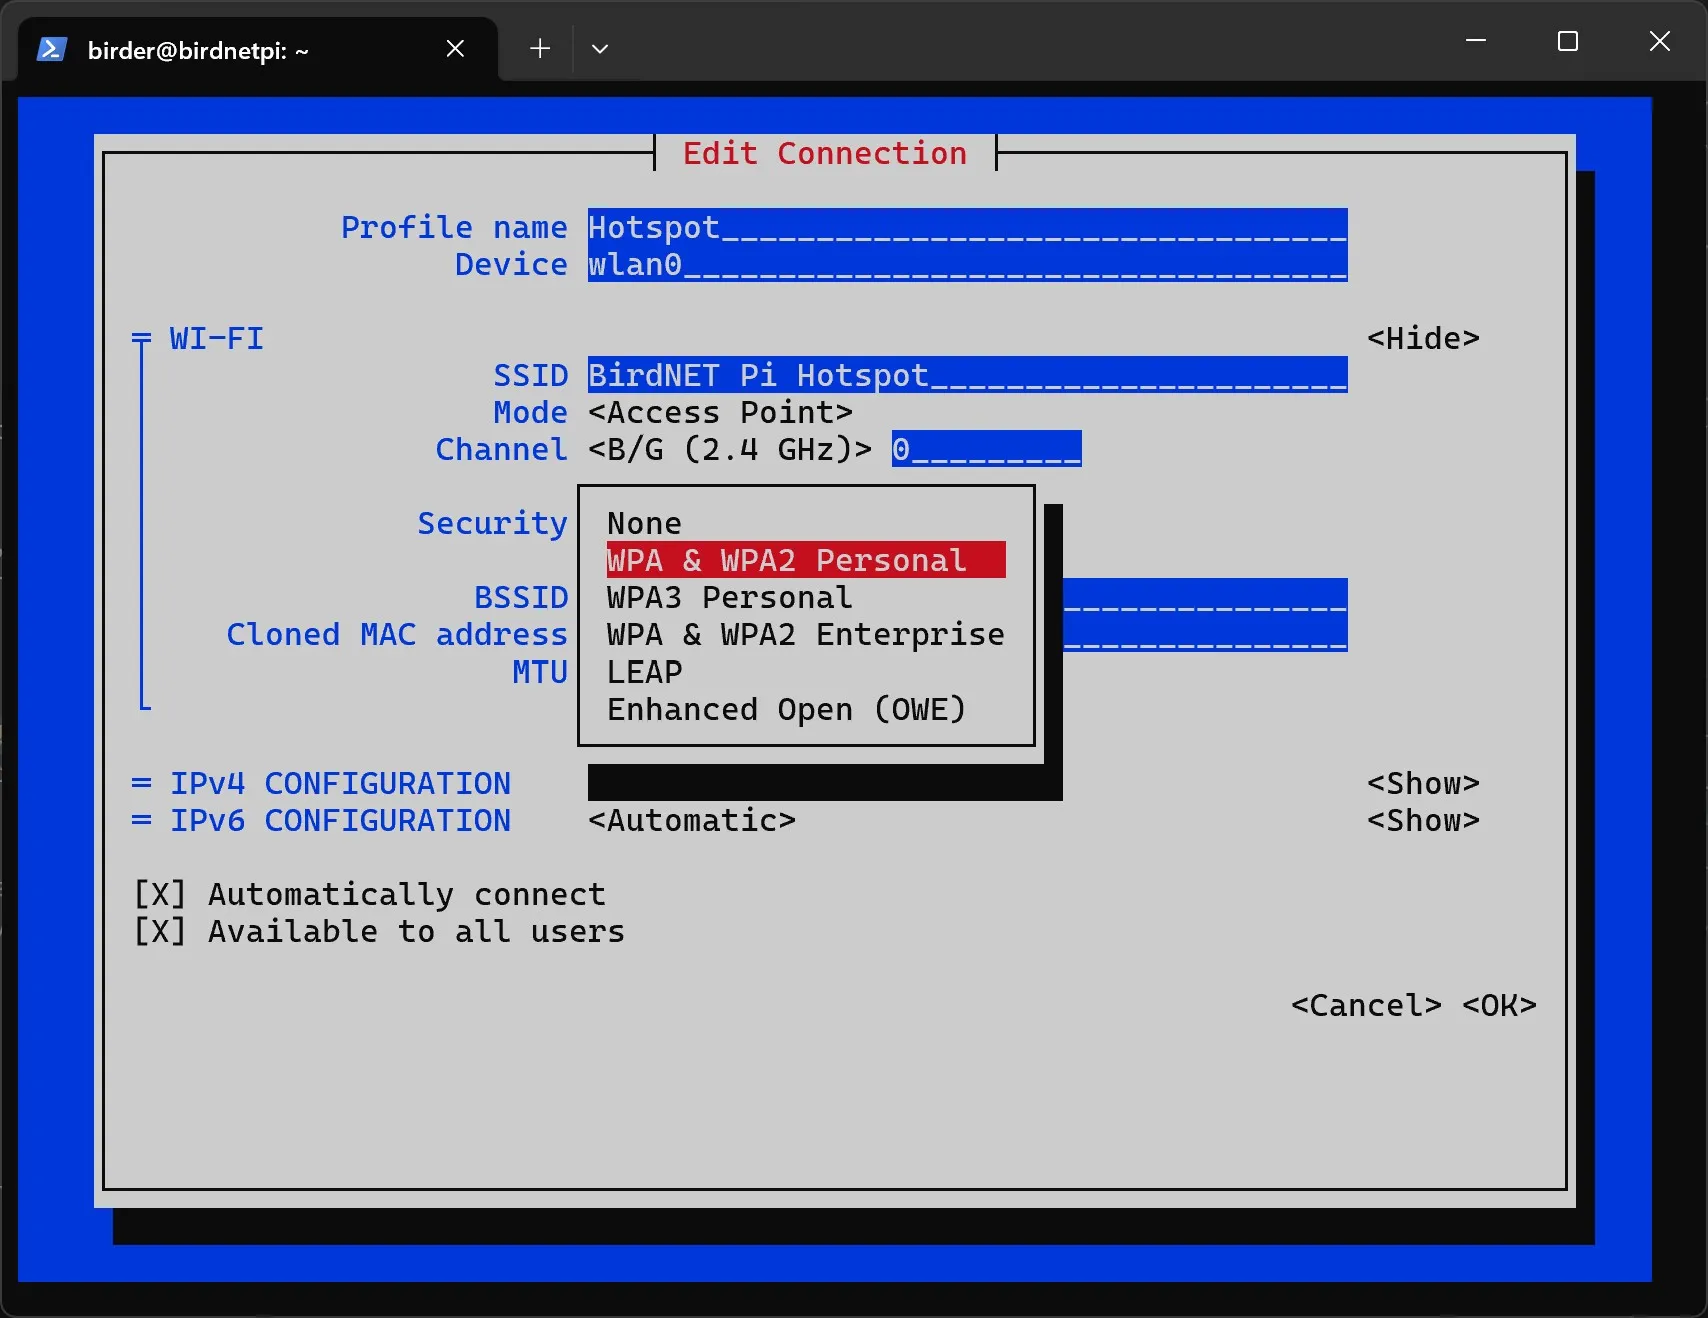
- For
Password, now enter the password for the hotspot. Remember it!
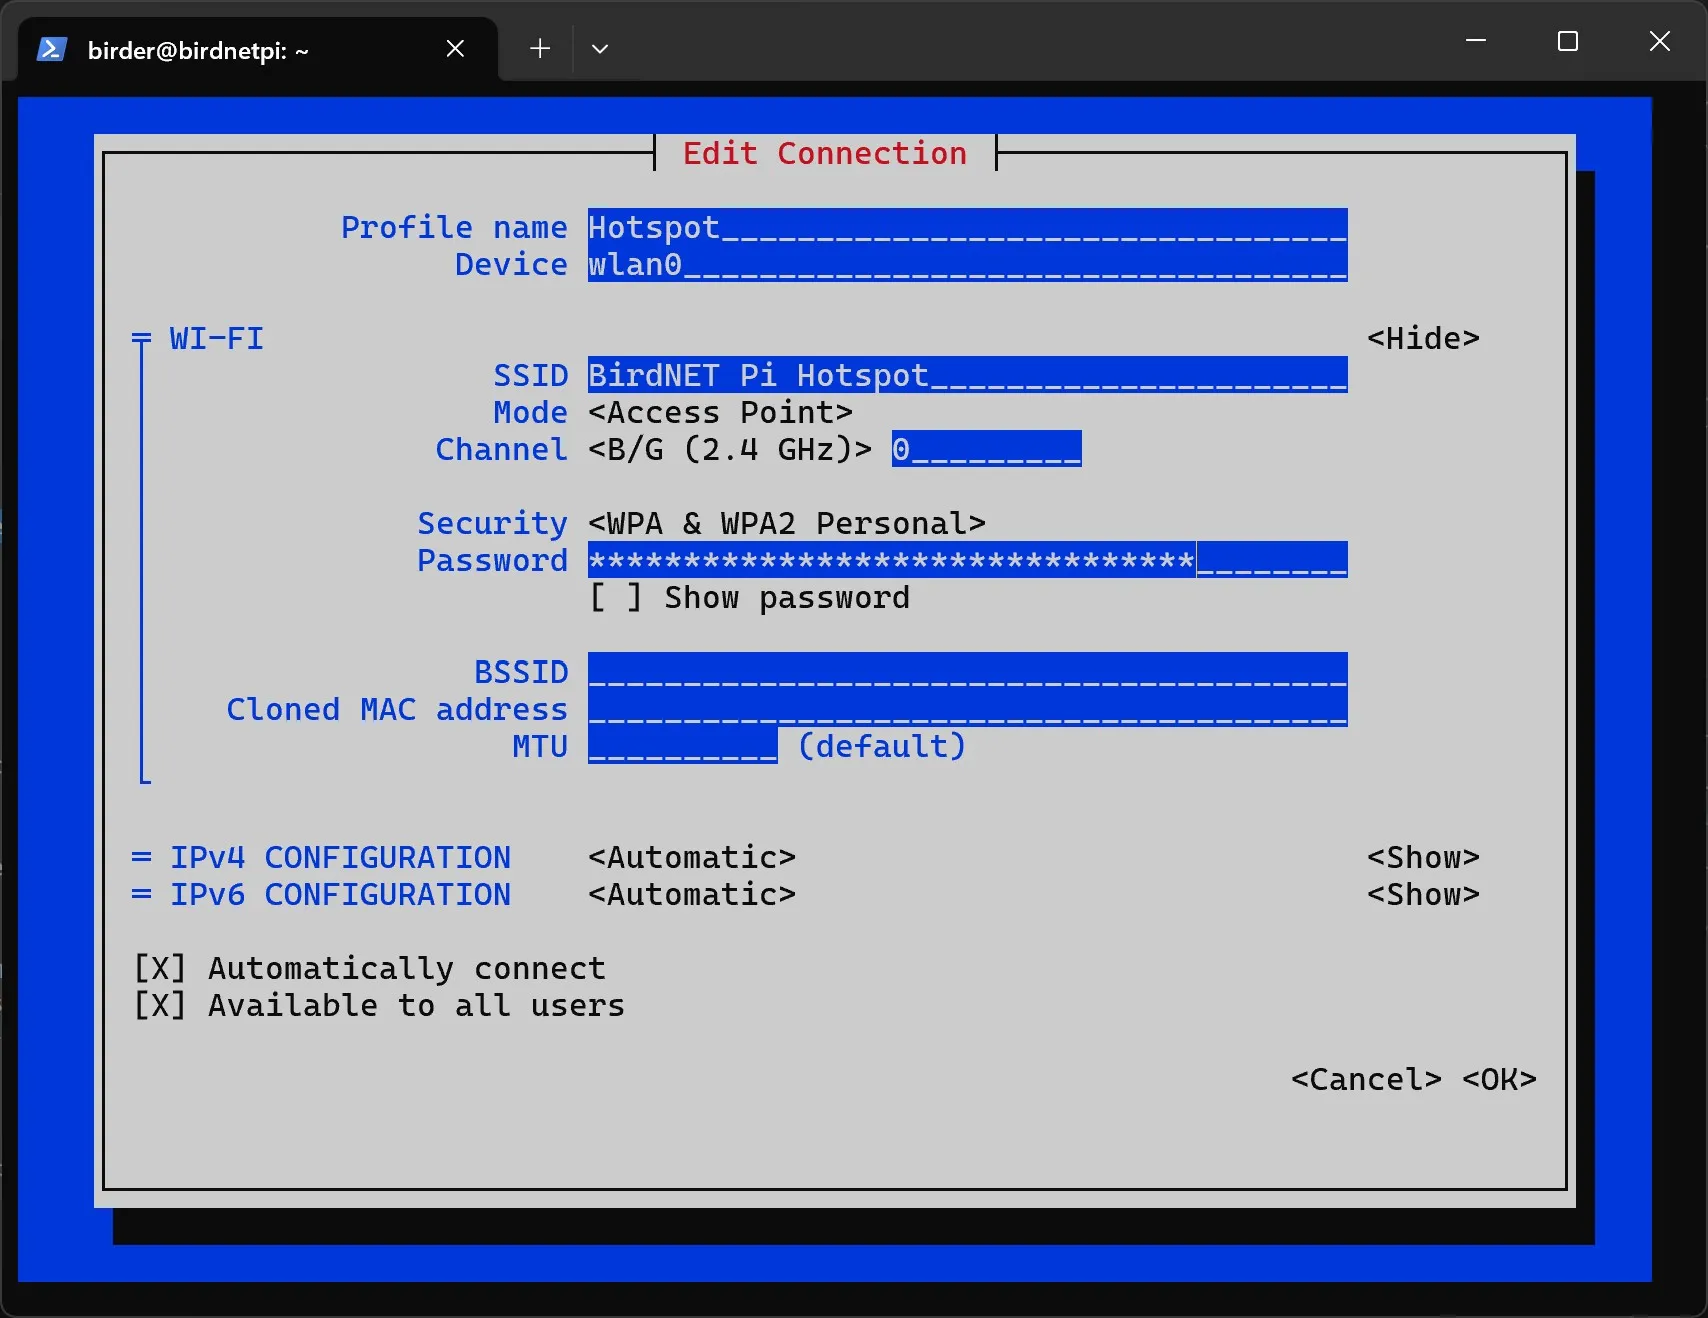
- Configure the IP settings as follows:
- IPv4 Configuration:
Shared - IPv6 Configuration:
Disabled
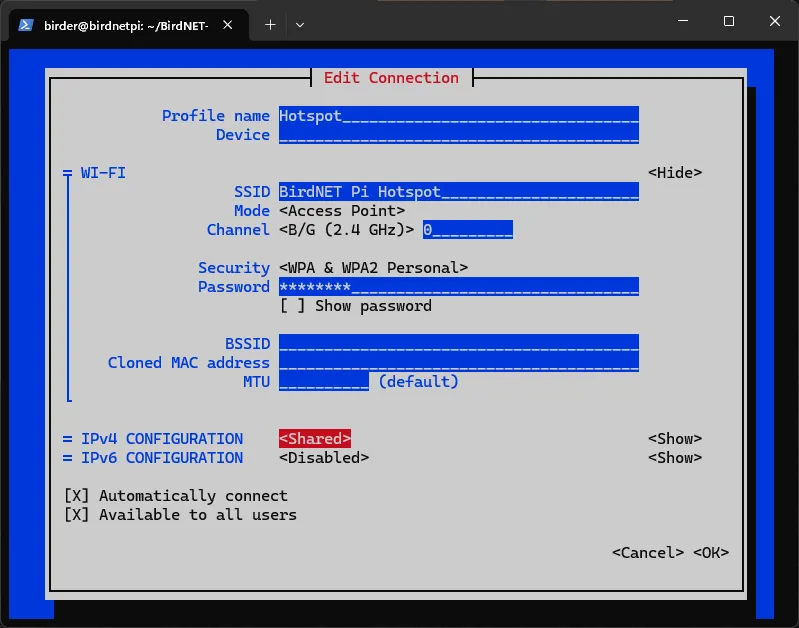
- Now we can close the program. To do so, go to
OKat the bottom. - Go to
Back.
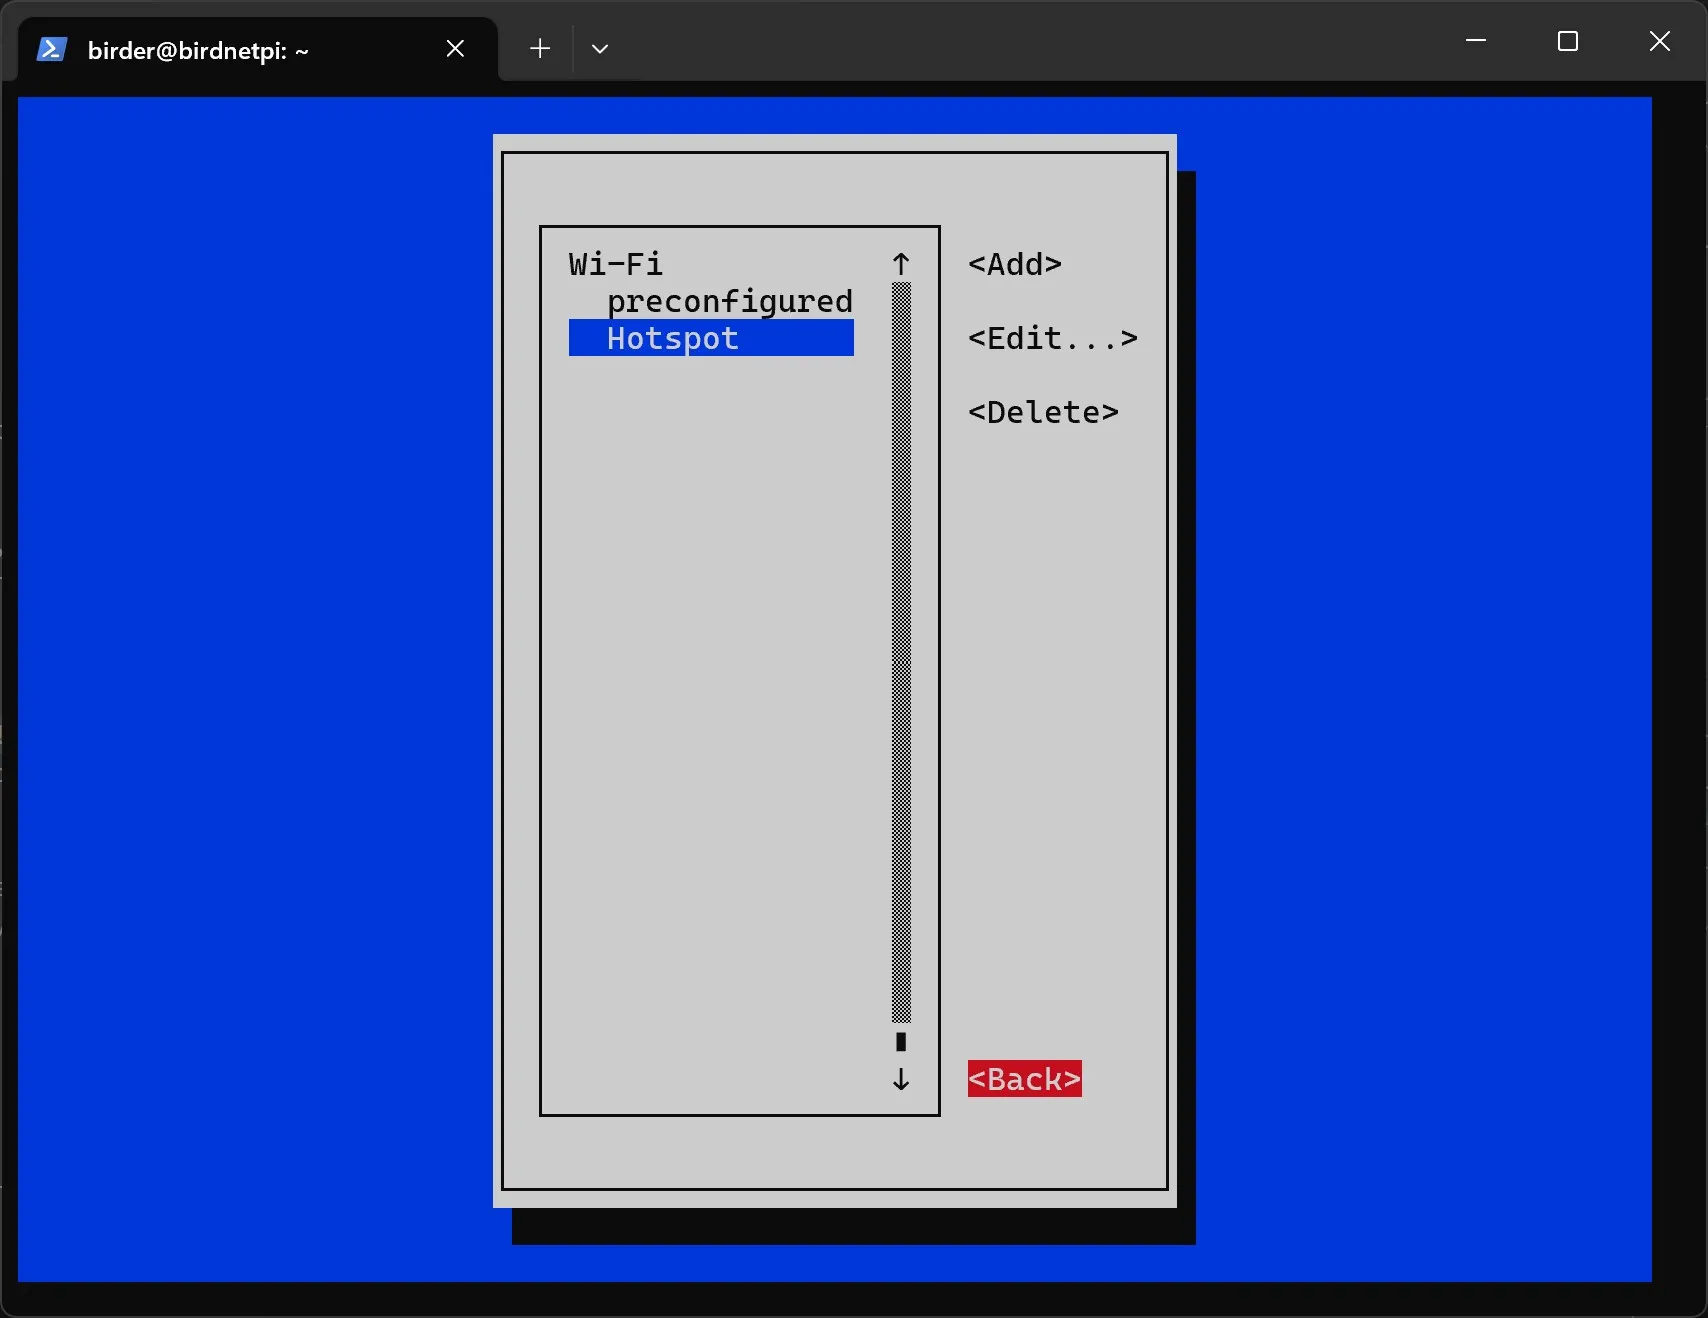
- Go to
Quit.
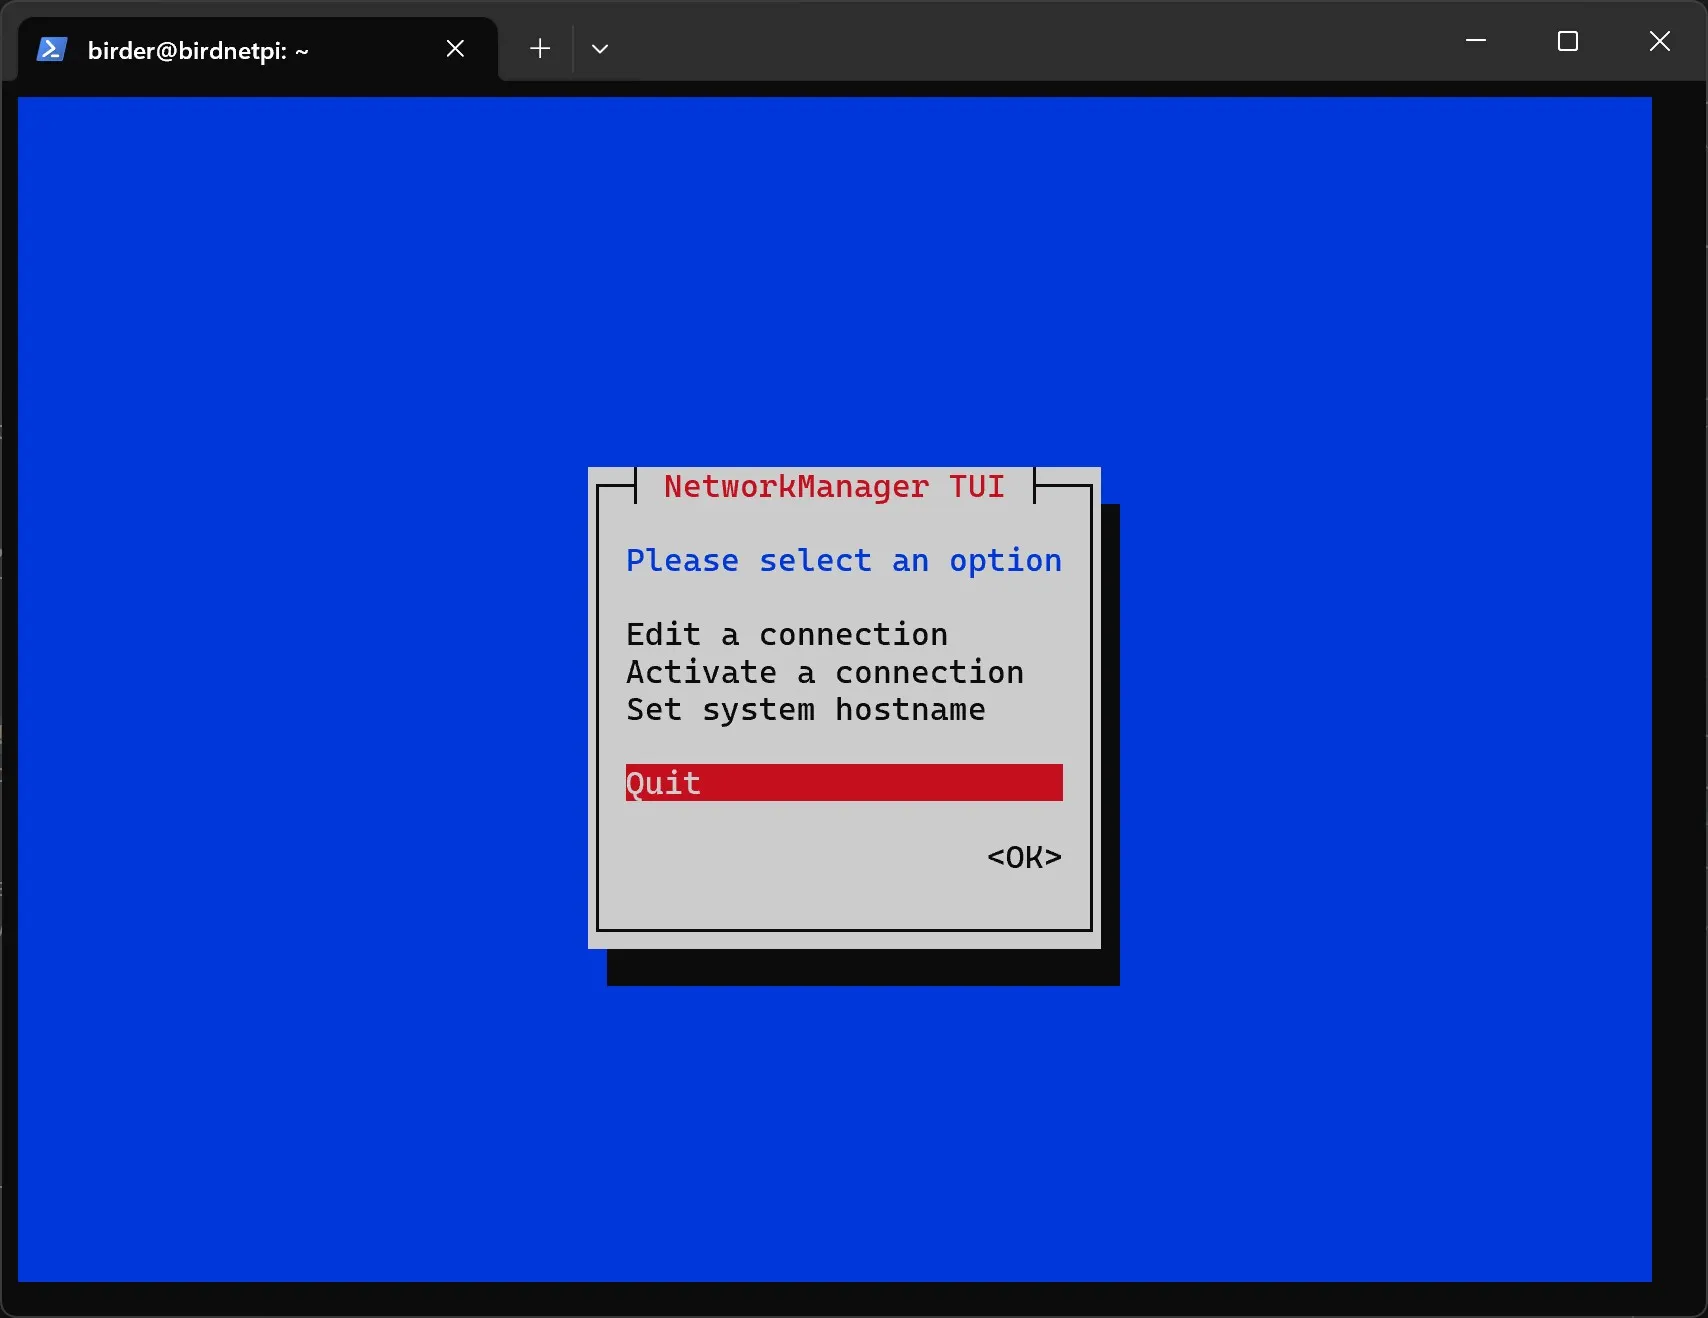
- Now we set the connection priorities of the Wi-Fi and hotspot connections.
This makes the Raspberry Pi try to connect to the known Wi-Fi first.
Only if no connection is possible does it automatically create its own hotspot,
so that a connection to the device can still be established.
First we have to navigate to the right folder using the
cdcommand.
cd /etc/NetworkManager/system-connectionsbirder@birdnetpi:~ $ cd /etc/NetworkManager/system-connections
birder@birdnetpi:/etc/NetworkManager/system-connections $- Now let’s first open the file for the hotspot connection.
sudo nano Hotspot.nmconnection GNU nano 7.2 Hotspot.nmconnection [connection]
id=Hotspot
uuid=4cc09b40-6ef0-4caf-bbf6-600fe2121122
type=wifi
interface-name=wlan0
[wifi]
band=bg
mode=ap
ssid=BirdNET Pi Hotspot
[wifi-security]
key-mgmt=wpa-psk
psk=Your hotspot password goes here
[ipv4]
method=auto
[ipv6]
addr-gen-mode=default
method=auto
[proxy]
[ Read 23 lines ]
^G Help ^O Write Out ^W Where Is ^K Cut ^T Execute ^C Location
^X Exit ^R Read File ^\ Replace ^U Paste ^J Justify ^/ Go To Line- Add the following code snippet to the first part of the file.
The entry
autoconnect=trueenables automatic connecting. The valueautoconnect-priority=0sets the priority of the network. The higher the number, the more this network is preferred when connecting automatically.
autoconnect=true
autoconnect-priority=0 GNU nano 7.2 Hotspot.nmconnection * [connection]
id=Hotspot
uuid=4cc09b40-6ef0-4caf-bbf6-600fe2121122
type=wifi
interface-name=wlan0
autoconnect=true
autoconnect-priority=0
[wifi]
band=bg
mode=ap
ssid=BirdNET Pi Hotspot
[wifi-security]
key-mgmt=wpa-psk
psk=Show your parents the bird!
[ipv4]
method=shared
[ipv6]
addr-gen-mode=default
method=disabled
[proxy]
^G Help ^O Write Out ^W Where Is ^K Cut ^T Execute ^C Location
^X Exit ^R Read File ^\ Replace ^U Paste ^J Justify ^/ Go To Line- Press Ctrl+X, then y, and finally Enter to save the file.
- Now let’s open the file for the Wi-Fi connection.
sudo nano preconfigured.nmconnection GNU nano 7.2 preconfigured.nmconnection [connection]
id=preconfigured
uuid=fh6c02n6-5th7-4911-9g5c-d356zh245
type=wifi
timestamp=27604593
[wifi]
hidden=true
mode=infrastructure
ssid=Your_WiFi_Name
[wifi-security]
key-mgmt=wpa-psk
psk=4c9ed4tg67fd672c6896d1ec9e1g885a61f4th322be
[ipv4]
method=auto
[ipv6]
addr-gen-mode=default
method=auto
[proxy]
[ Read 23 lines ]
^G Help ^O Write Out ^W Where Is ^K Cut ^T Execute ^C Location
^X Exit ^R Read File ^\ Replace ^U Paste ^J Justify ^/ Go To Line- Add the following code snippet to the first part of the file.
autoconnect=true
autoconnect-priority=10 GNU nano 7.2 preconfigured.nmconnection [connection]
id=preconfigured
uuid=fh6c02n6-j705-4911-9g5c-d36127245
type=wifi
timestamp=27604593
autoconnect=true
autoconnect-priority=10
[wifi]
hidden=true
mode=infrastructure
ssid=Your_WiFi_Name
[wifi-security]
key-mgmt=wpa-psk
psk=4c9efd672c68947g4884e4f62744756d1ec9e1g885a61f322be
[ipv4]
method=auto
[ipv6]
addr-gen-mode=default
method=auto
[proxy]
[ Wrote 27 lines ]
^G Help ^O Write Out ^W Where Is ^K Cut ^T Execute ^C Location
^X Exit ^R Read File ^\ Replace ^U Paste ^J Justify ^/ Go To Line- Press Ctrl+X, then y, and finally Enter to save the file.
- Now restart the Raspberry Pi.
sudo reboot