Set up hotspot (optional)
When should I do this?
Section titled “When should I do this?”If your BirdNET Pi is only set up inside your Wi-Fi network, you can skip the following steps. In this section we will make settings so that if your BirdNET Pi is outside your Wi-Fi network, it works as a hotspot and emits its own Wi-Fi network (this has no internet access), so you can connect from your phone to the BirdNET Pi via Wi-Fi and access the data of the BirdNET Pi. You can also e.g. add other Wi-Fi connections here or change Wi-Fi data already entered in Raspberry Pi OS setup.
Instructions
Section titled “Instructions”- Connect via ssh.
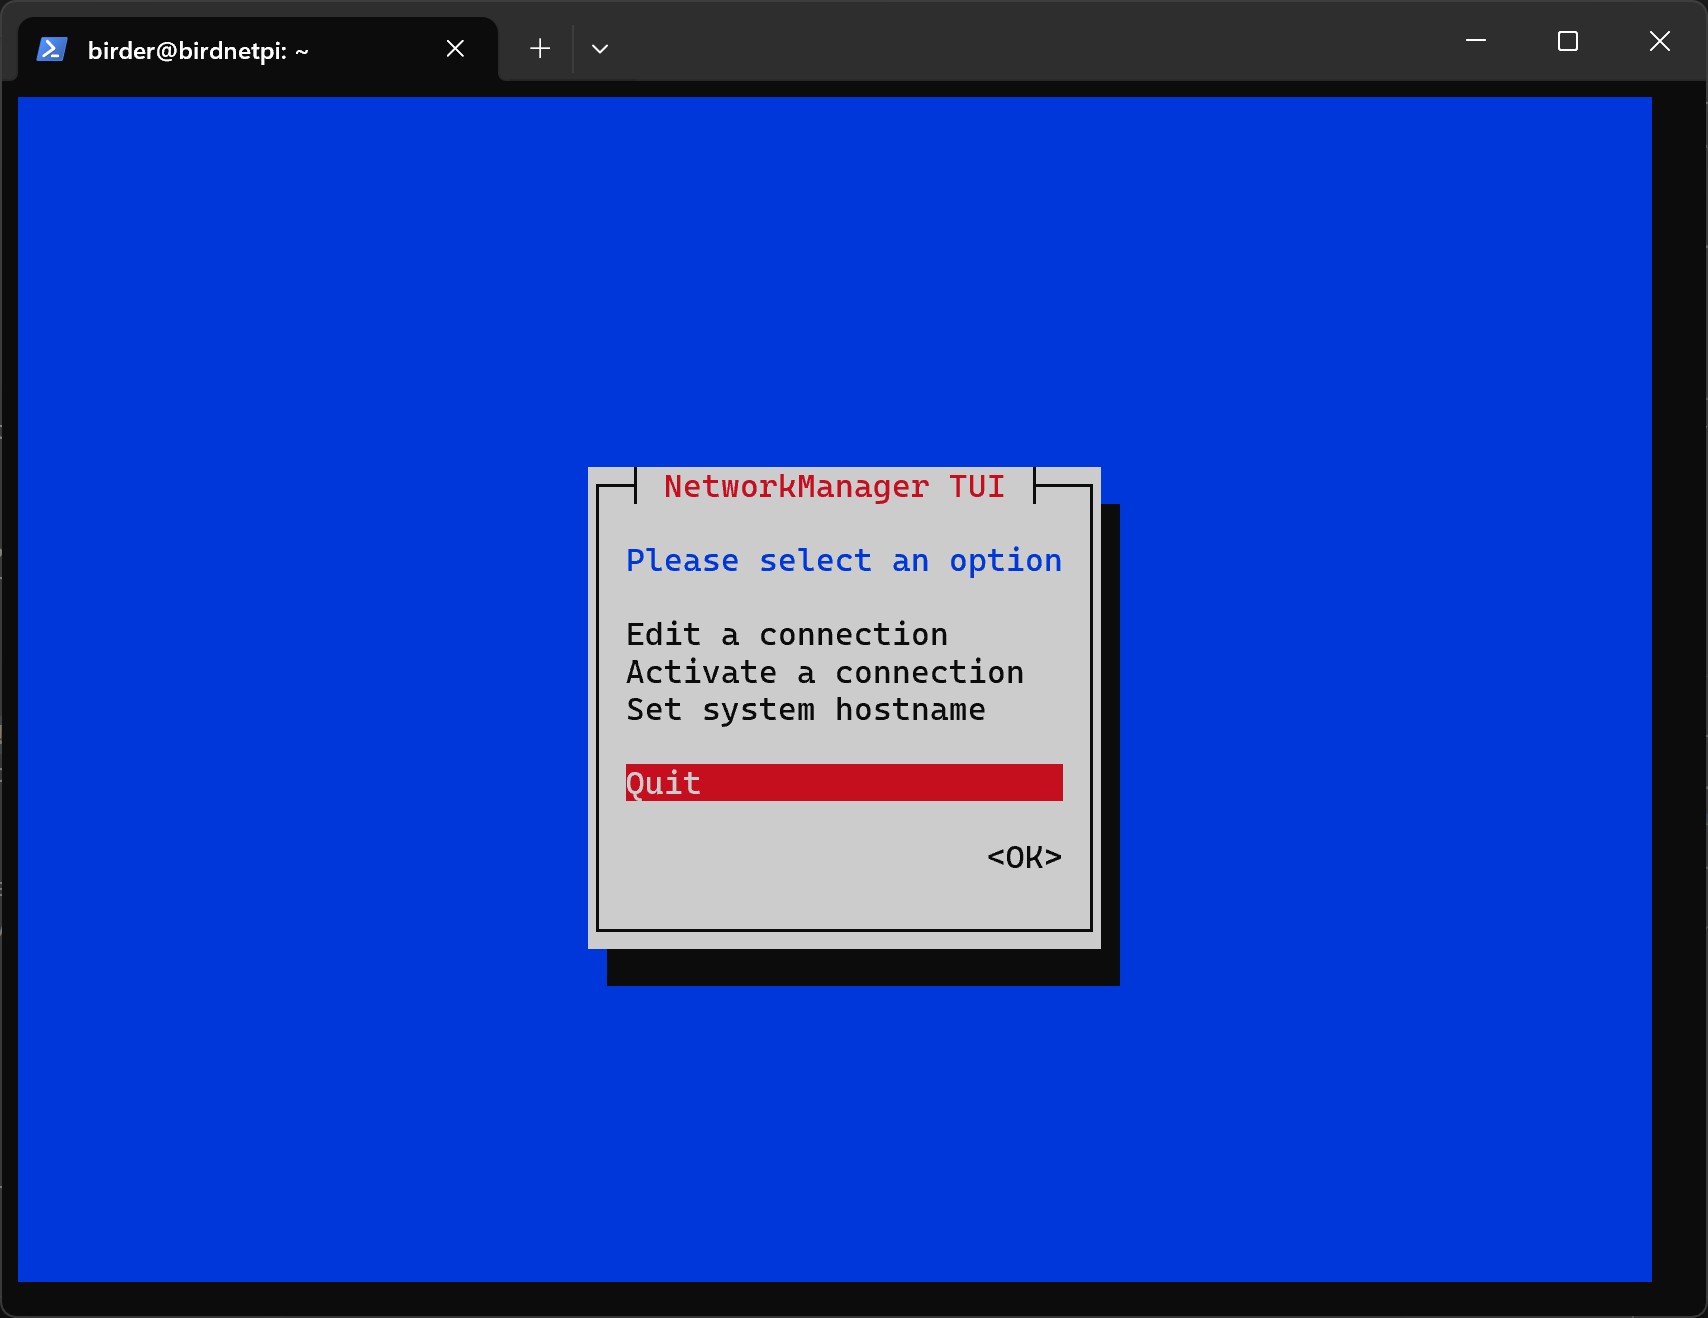
- Now we edit the Wi-Fi and hotspot settings. For this we first have to open the NetworkManager:
sudo nmtui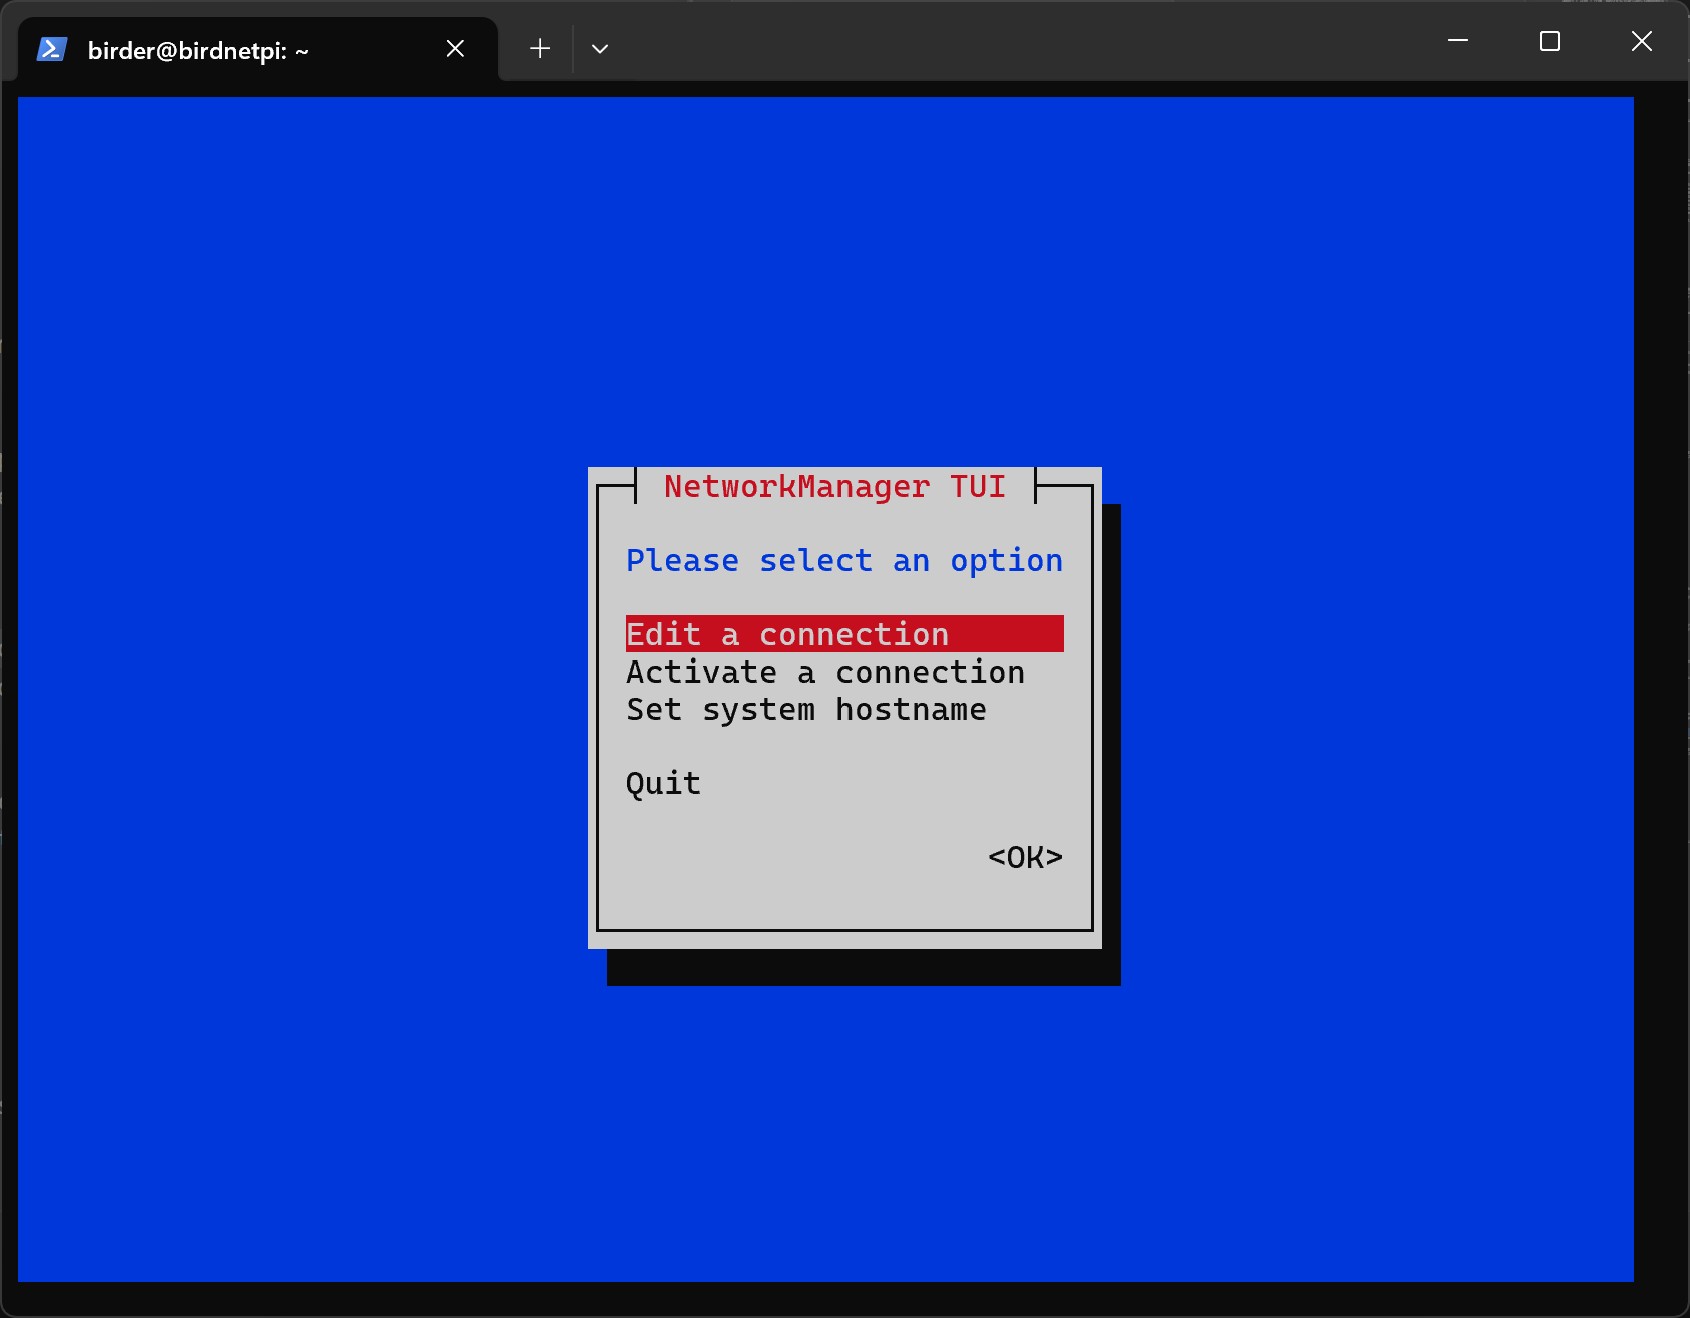
-
In NetworkManager you can move the selected item with the
Arrow then keys Arrow keys Arrow then keys Arrow keys and confirm withEnter Enter Enter Enter . -
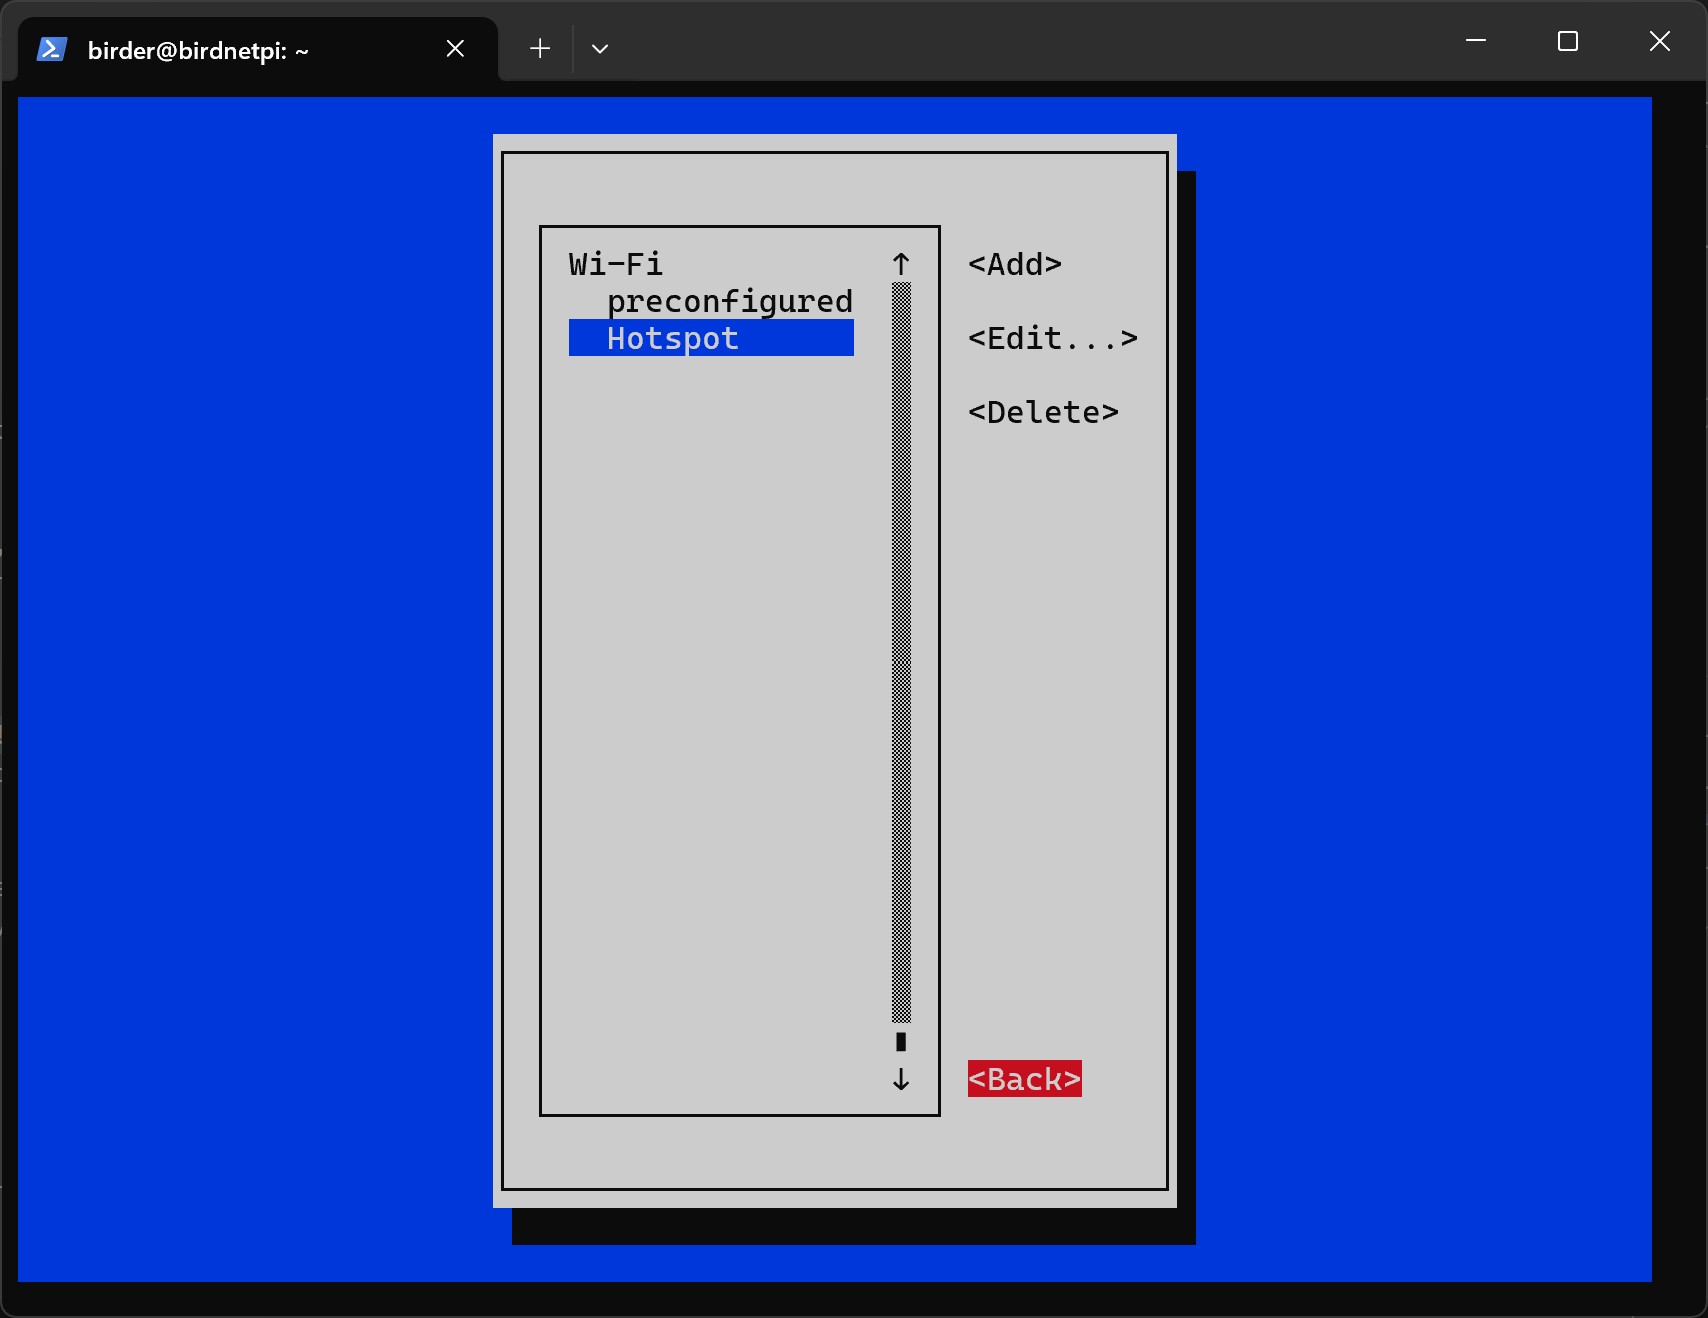
Select
Edit a connection.
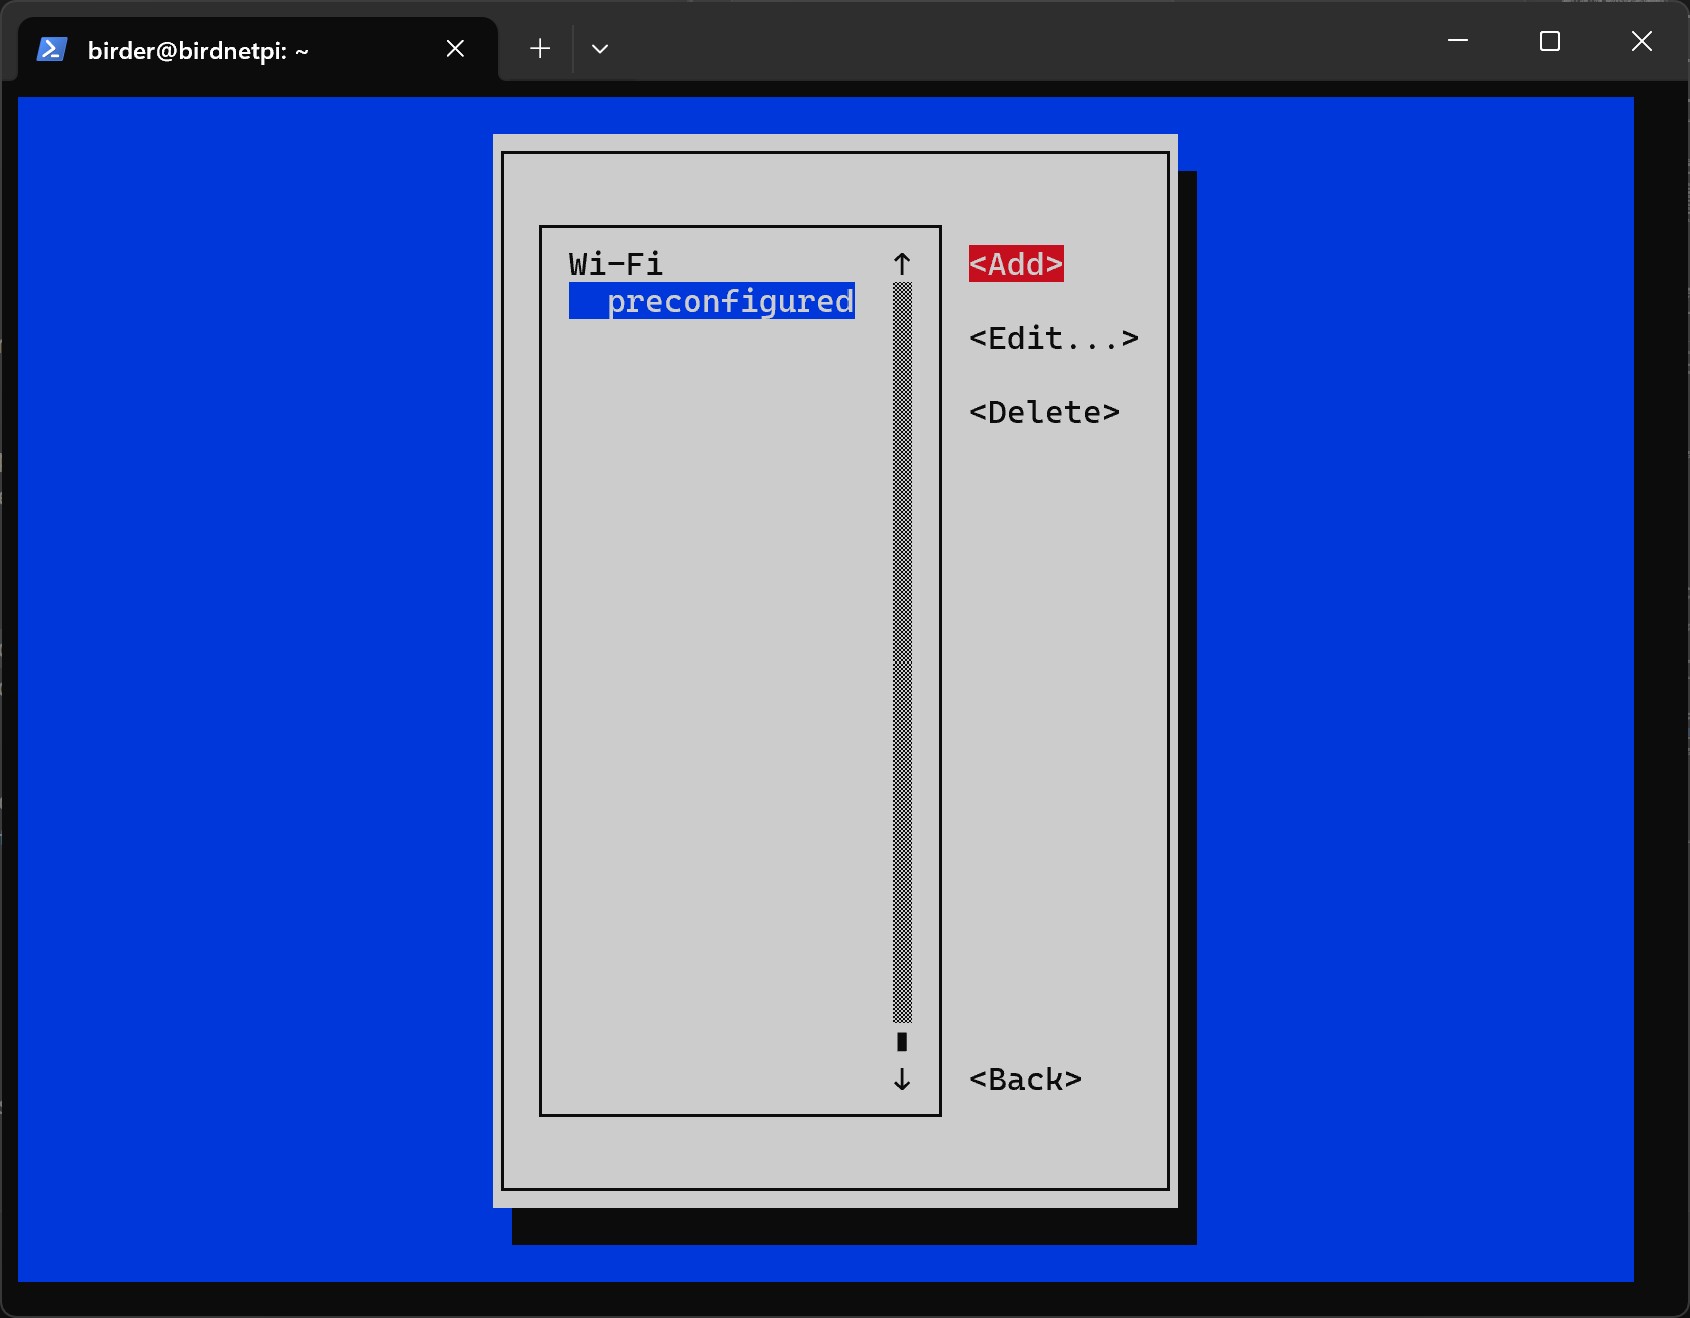
- Select
Add.
- Select
Wi-Fias connection type.
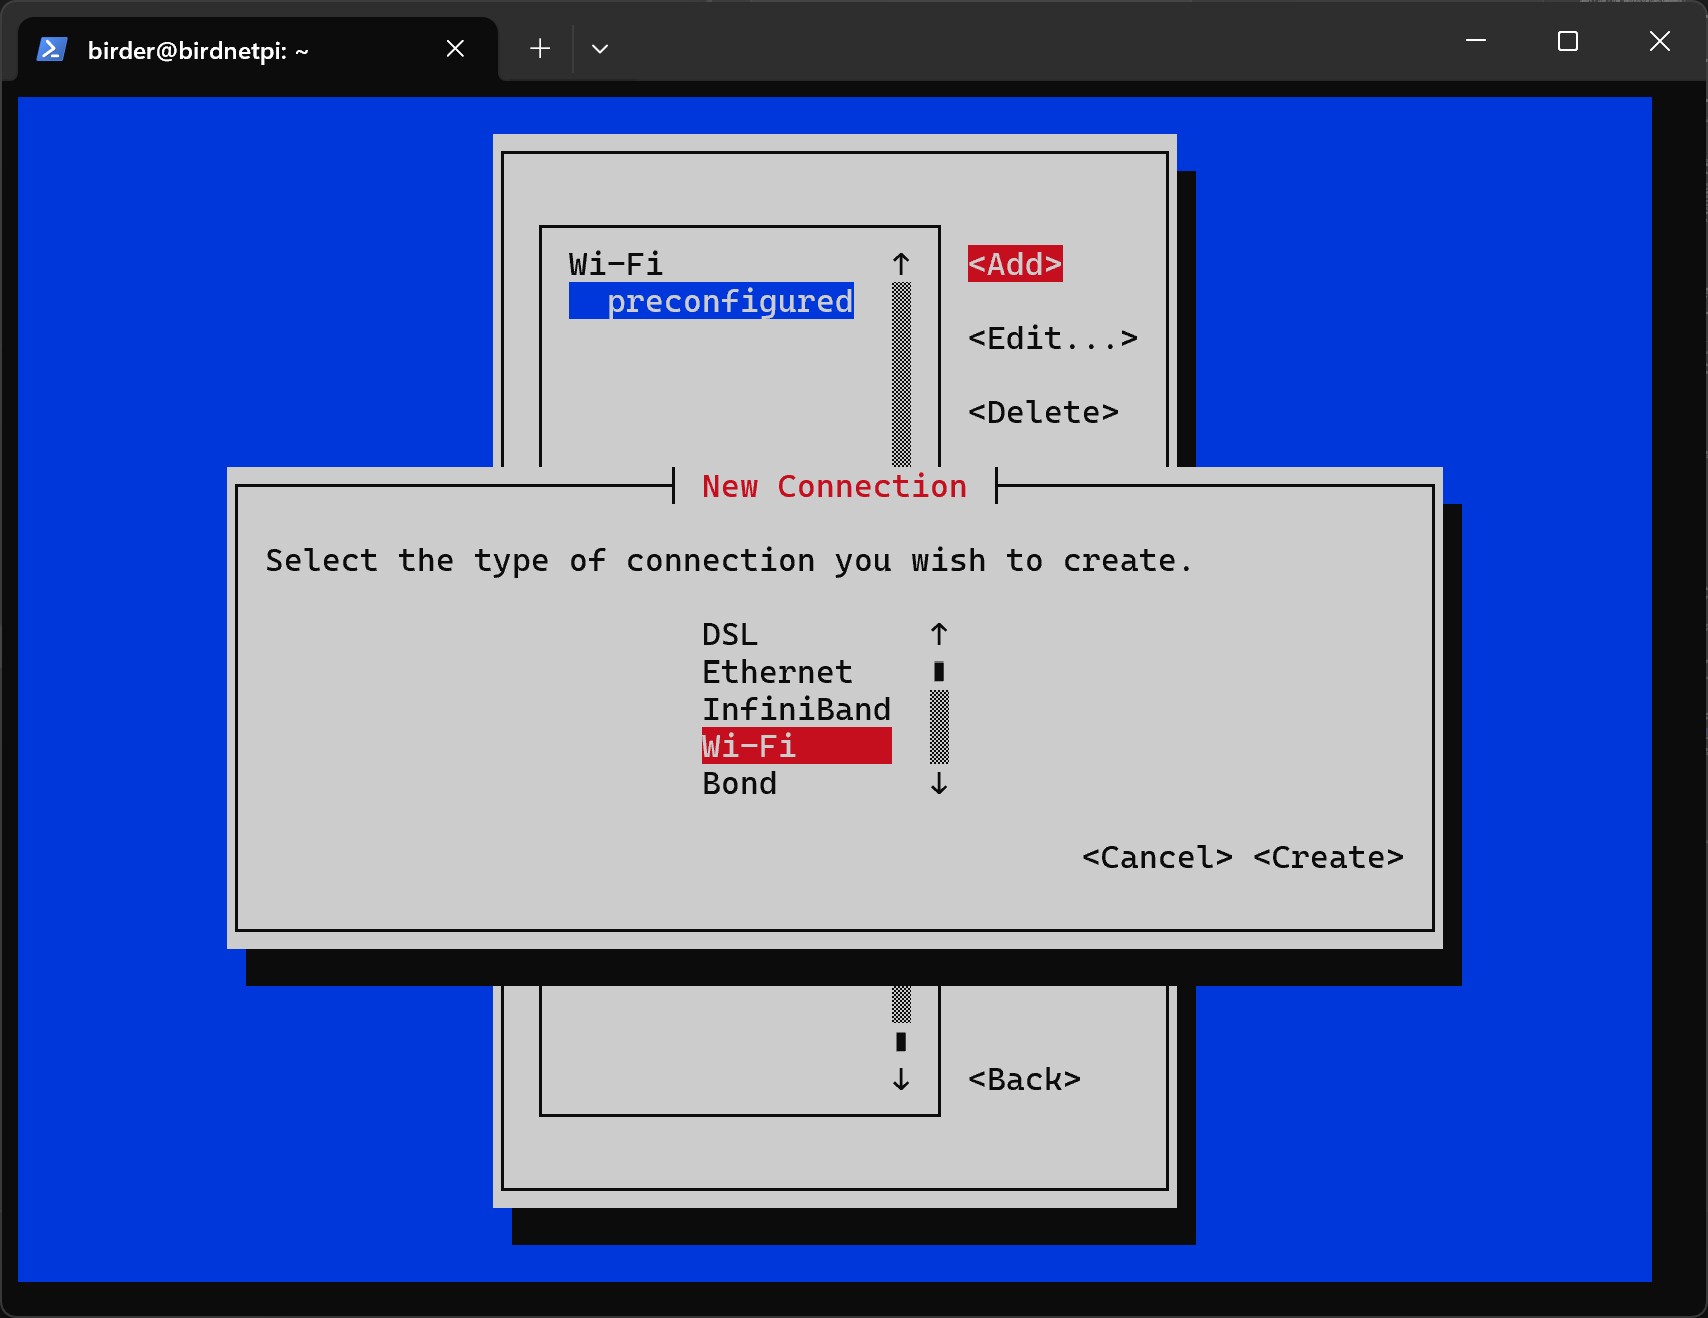
- Select
Create.
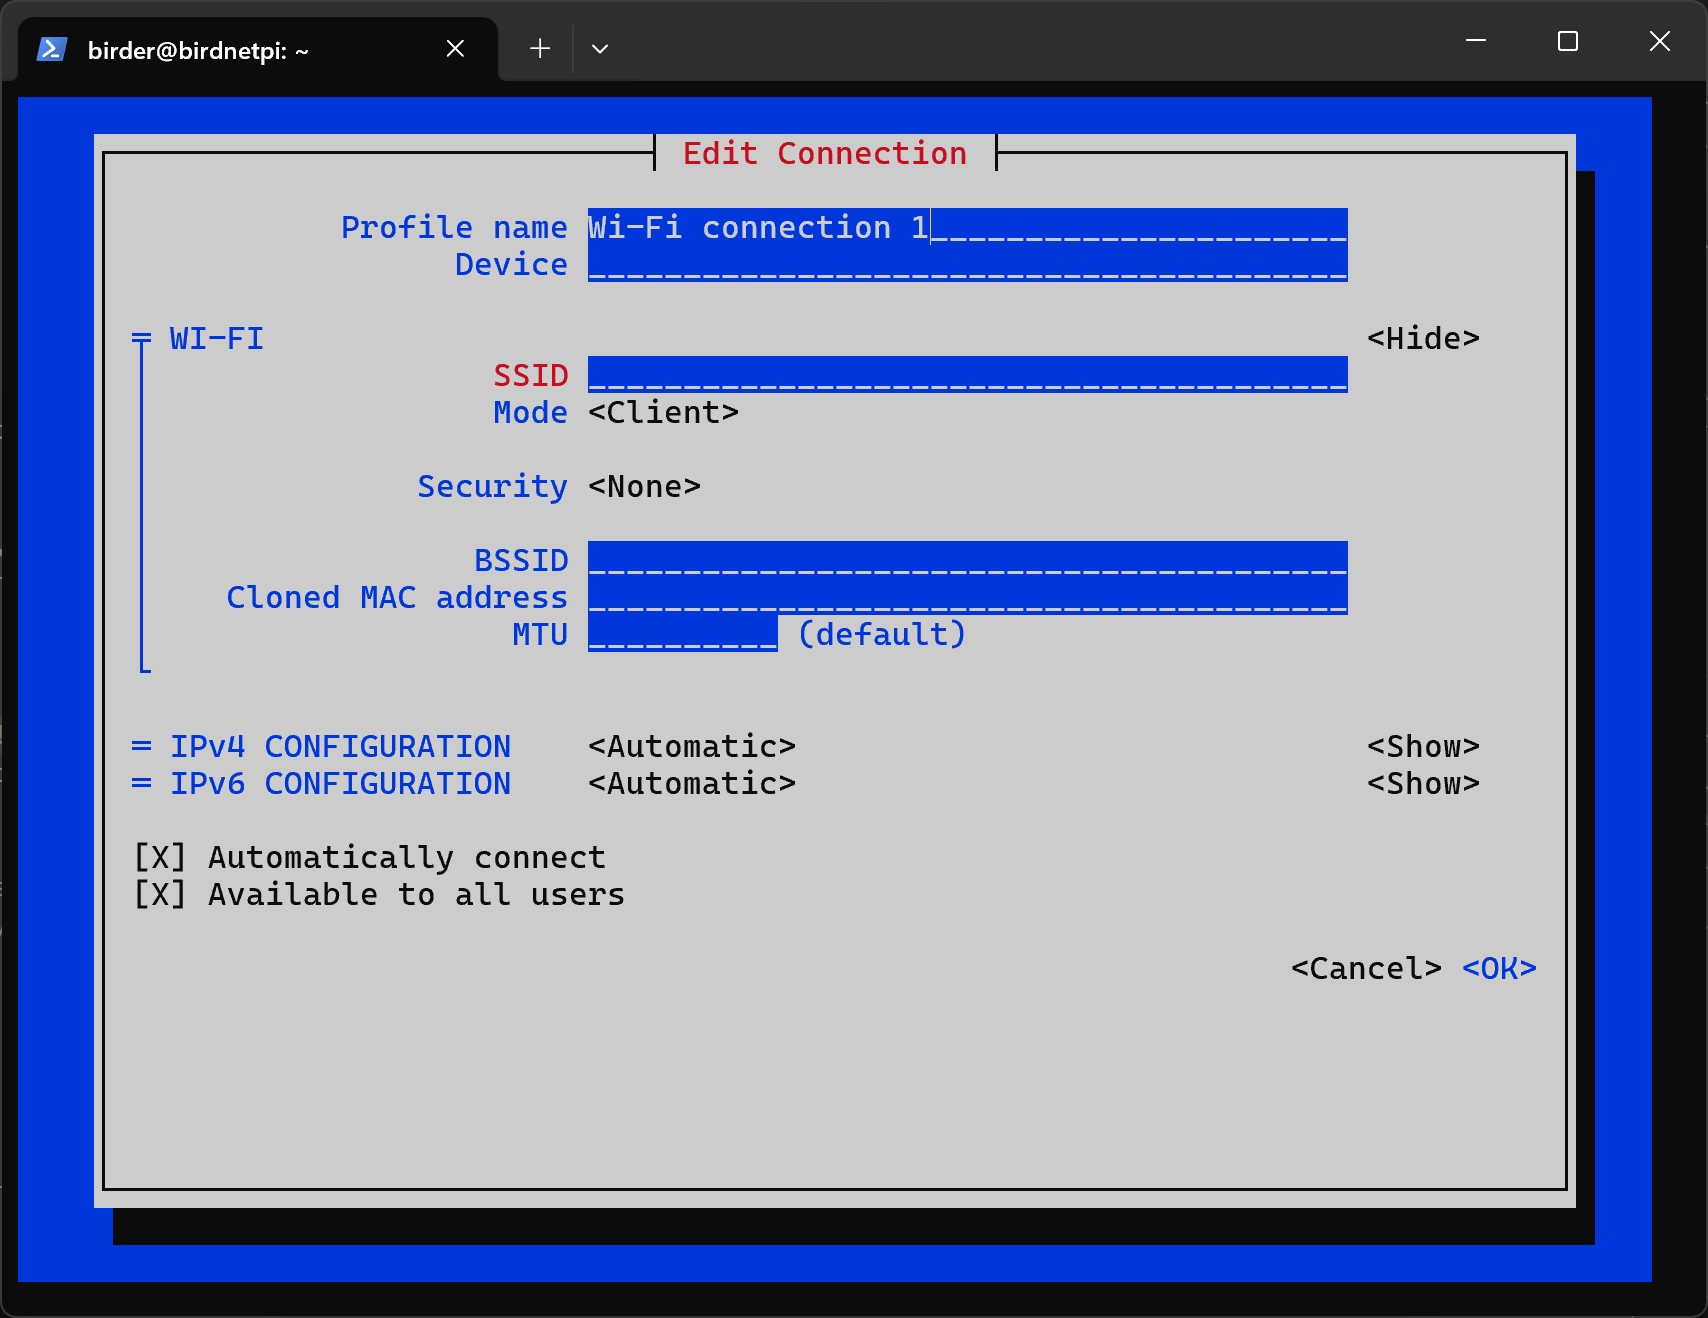
- Now you have to add the data of your network.
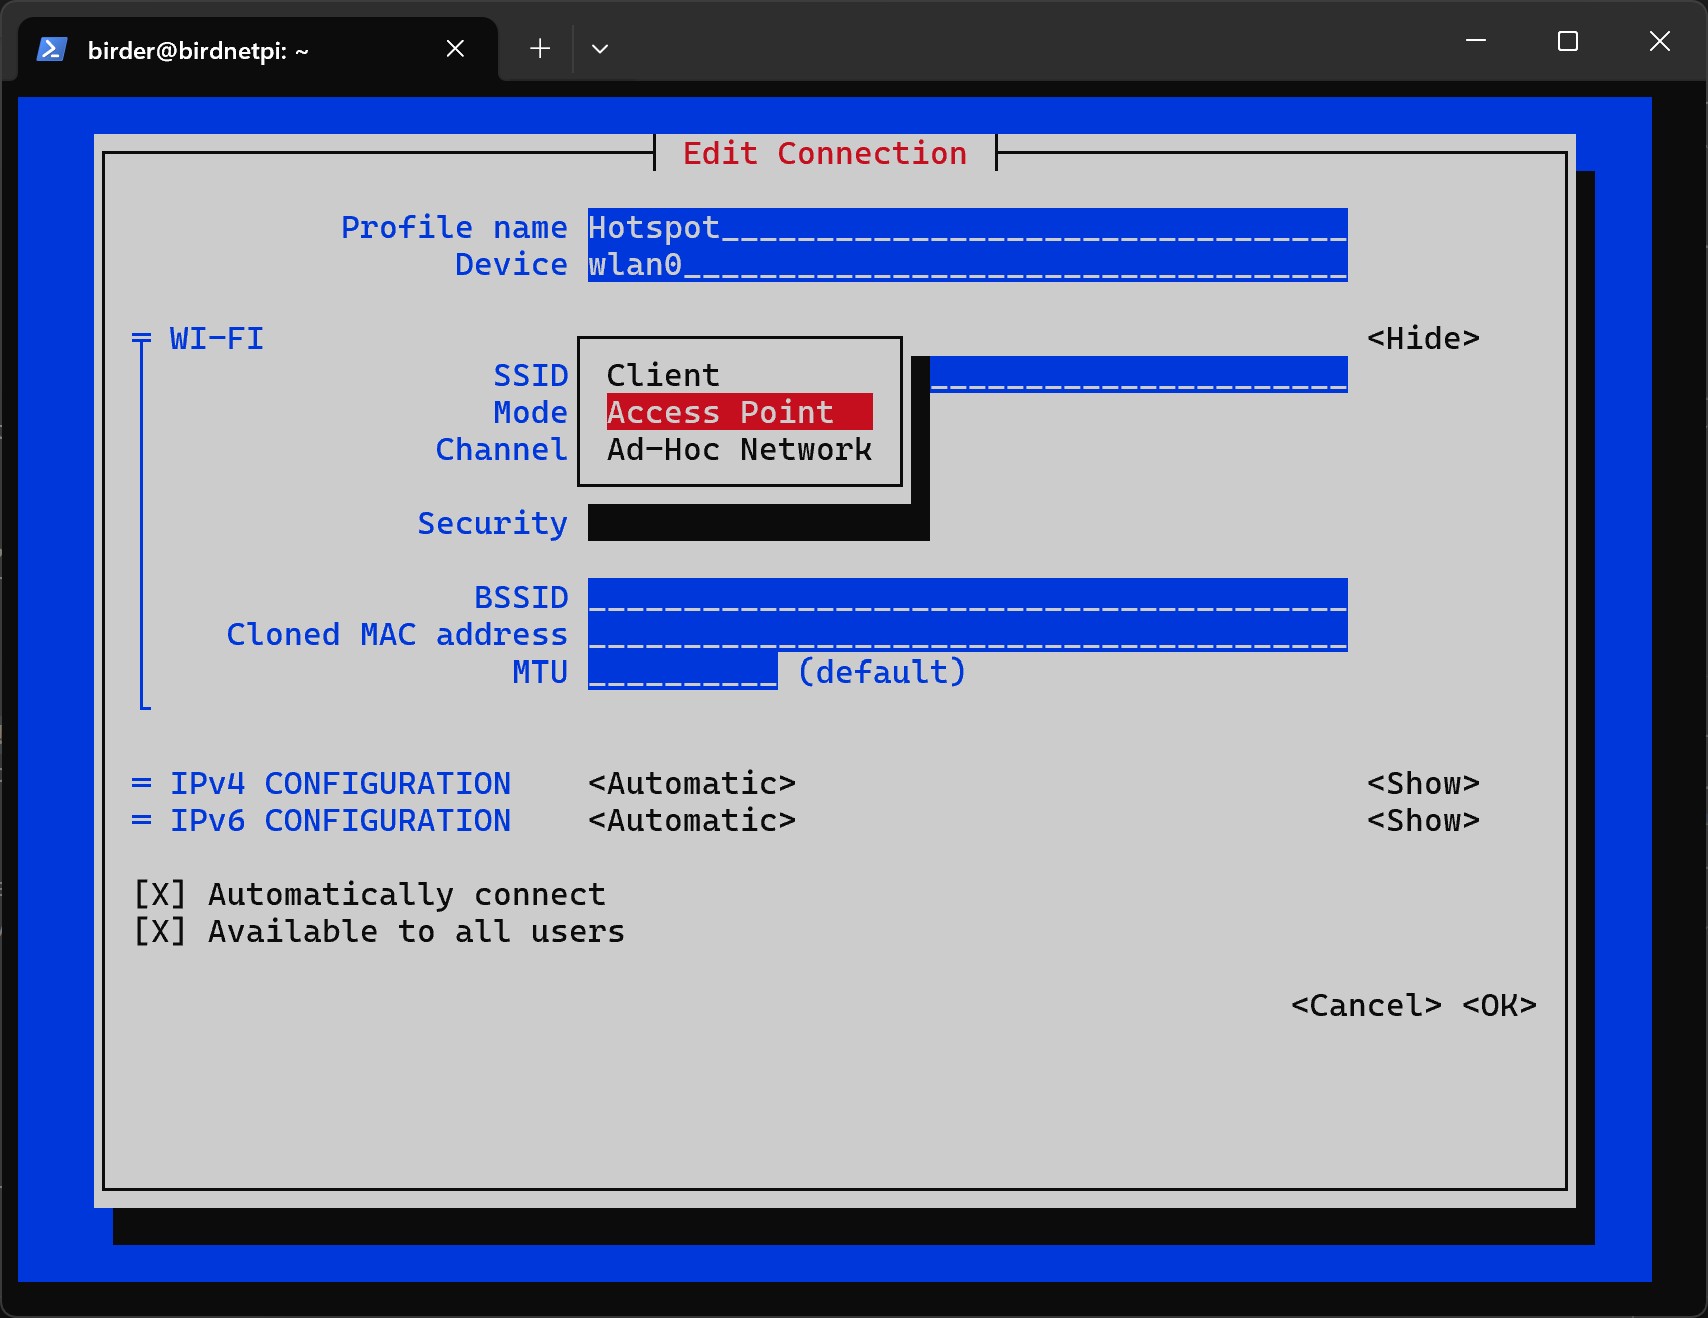
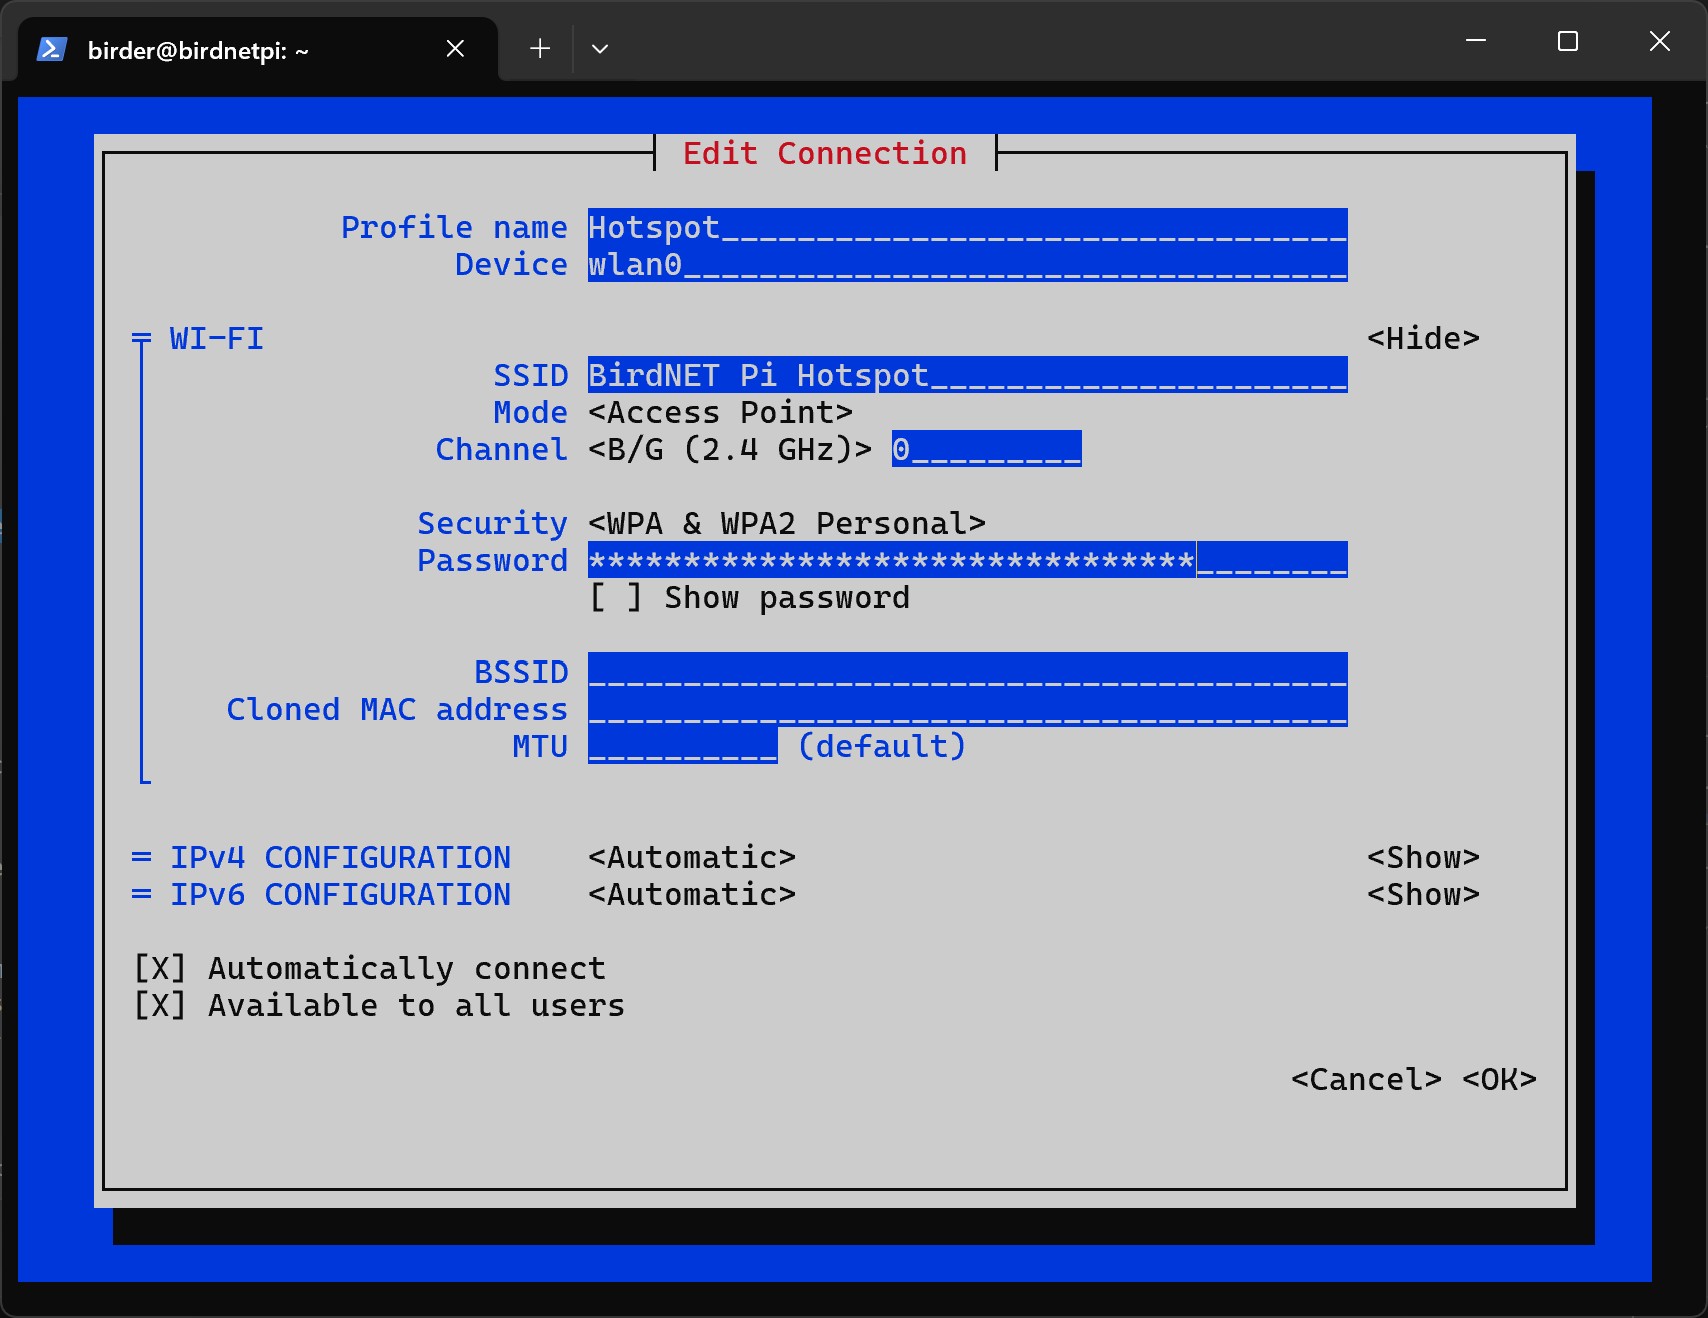
Profile Nameis only for identification, you can enter any name here. But make sure to replace Hotspot with your chosen name in the following commands.Deviceis wlan0SSIDis the name of the Wi-Fi network created, you can also choose this freely, but remember it!

- Select
Access PointforMode.
- Select
B/G (2.4 GHz)forChannel.

- For
Security, selectWPA & WPA2 Personal.

- Enter the hotspot password under
Password. Remember it!
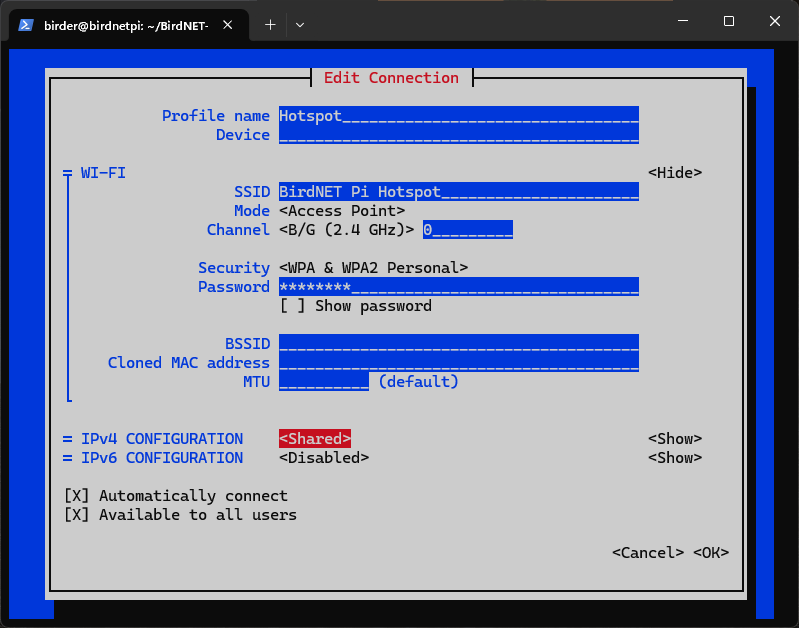
- Configure the IP settings as follows:
- IPv4 Configuration:
Shared - IPv6 Configuration:
Disabled
- Now we can close the program. Go down to
OK. - Go to
Back.
- Go to
Quit.
- Now set the connection priorities for Wi-Fi and hotspot connection.
This way the Raspberry Pi will try to connect to the known Wi-Fi network first.
Only if no connection is possible, it will automatically create its own hotspot so that a connection to the device can still be made.
First we need to navigate to the correct folder with the
cdcommand.
cd /etc/NetworkManager/system-connectionsbirder@birdnetpi:~ $ cd /etc/NetworkManager/system-connectionsbirder@birdnetpi:/etc/NetworkManager/system-connections $- Now open the file for the hotspot connection.
sudo nano Hotspot.nmconnection GNU nano 7.2 Hotspot.nmconnection [connection]id=Hotspotuuid=4cc09b40-6ef0-4caf-bbf6-600fe2121122type=wifiinterface-name=wlan0
[wifi]band=bgmode=apssid=BirdNET Pi Hotspot
[wifi-security]key-mgmt=wpa-pskpsk=Hier steht dein Passwort f�r den Hotspot
[ipv4]method=auto
[ipv6]addr-gen-mode=defaultmethod=auto
[proxy]
[ Read 23 lines ]
^G Help ^O Write Out ^W Where Is ^K Cut ^T Execute ^C Location^X Exit ^R Read File ^\ Replace ^U Paste ^J Justify ^/ Go To Line- Add the following code snippet in the first part of the file.
The entry
autoconnect=trueactivates automatic connection. The valueautoconnect-priority=0sets the priority of the network. The higher the number, the more preferred that network is during auto-connect.
autoconnect=trueautoconnect-priority=0 GNU nano 7.2 Hotspot.nmconnection * [connection]id=Hotspotuuid=4cc09b40-6ef0-4caf-bbf6-600fe2121122type=wifiinterface-name=wlan0
autoconnect=trueautoconnect-priority=0
[wifi]band=bgmode=apssid=BirdNET Pi Hotspot
[wifi-security]key-mgmt=wpa-pskpsk=Den Eltern mal den Vogel zeigen!
[ipv4]method=shared
[ipv6]addr-gen-mode=defaultmethod=disabled
[proxy]
^G Help ^O Write Out ^W Where Is ^K Cut ^T Execute ^C Location^X Exit ^R Read File ^\ Replace ^U Paste ^J Justify ^/ Go To Line- Press
Control + x Ctrlx Control + x Ctrlx , theny y y y , finallyEnter Enter Enter Enter to save the file. - Now open the file for the Wi-Fi connection.
sudo nano preconfigured.nmconnection GNU nano 7.2 preconfigured.nmconnection [connection]id=preconfigureduuid=fh6c02n6-5th7-4911-9g5c-d356zh245type=wifitimestamp=27604593
[wifi]hidden=truemode=infrastructuressid=Your_Wi-Fi_Name
[wifi-security]key-mgmt=wpa-pskpsk=4c9ed4tg67fd672c6896d1ec9e1g885a61f4th322be
[ipv4]method=auto
[ipv6]addr-gen-mode=defaultmethod=auto
[proxy]
[ Read 23 lines ]
^G Help ^O Write Out ^W Where Is ^K Cut ^T Execute ^C Location^X Exit ^R Read File ^\ Replace ^U Paste ^J Justify ^/ Go To Line- Add the following code snippet in the first part of the file.
autoconnect=trueautoconnect-priority=10 GNU nano 7.2 preconfigured.nmconnection [connection]id=preconfigureduuid=fh6c02n6-j705-4911-9g5c-d36127245type=wifitimestamp=27604593
autoconnect=trueautoconnect-priority=10
[wifi]hidden=truemode=infrastructuressid=Your_Wi-Fi_Name
[wifi-security]key-mgmt=wpa-pskpsk=4c9efd672c68947g4884e4f62744756d1ec9e1g885a61f322be
[ipv4]method=auto
[ipv6]addr-gen-mode=defaultmethod=auto
[proxy]
[ Wrote 27 lines ]
^G Help ^O Write Out ^W Where Is ^K Cut ^T Execute ^C Location^X Exit ^R Read File ^\ Replace ^U Paste ^J Justify ^/ Go To Line- Press
Control + x Ctrlx Control + x Ctrlx , theny y y y , finallyEnter Enter Enter Enter to save the file. - Reboot the Raspberry Pi now.
sudo reboot